
Adding a Technical User
Introduction
If you would like WTS to assist in the configuration of your Moneris eSelect Plus account we can help. In order to separate and delegate the technical permissions from the business permissions we request that you create a second login for us to use. Please follow the instructions below to create the login. The instructions assume you have activated your eSelect Plus access. If you have not, please do so following our Activate Your Moneris eSelect Access documentation.
If you encounter issues with any of the following steps, please feel free to email wts-moneris-tech@uwo.ca.
Procedure
1. Sign In to the Moneris eSelect Plus Merchant Resource Center
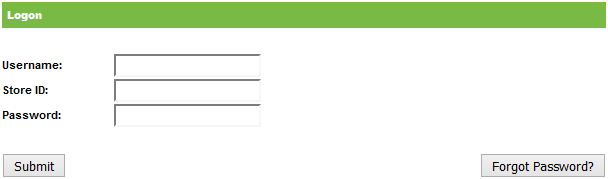
- Open an internet browser and go to: https://www3.moneris.com/mpg/.
- Enter your Username, Store ID, and Password.
- Click Submit.
- Answer the secondary challenge question.
2. Navigate to the Add User Screen

- Click ADMIN from the top menu.
- Click add user from the sub menu.
3. Enter the User Details
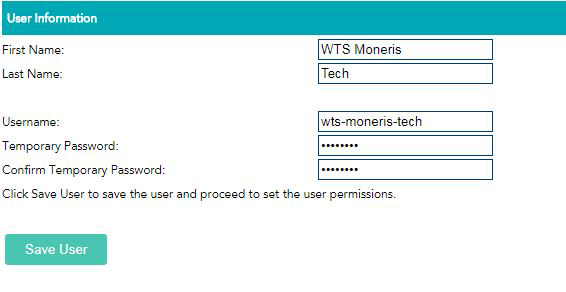
- Enter the First Name of 'WTS Moneris'.
- Enter the Last Name of 'Tech'.
- Enter the Username of 'wts-moneris-tech'.
- Create a temporary password. WTS will change this after you pass off the newly created login.
- Click Save User.
4. Assign the Access Permissions
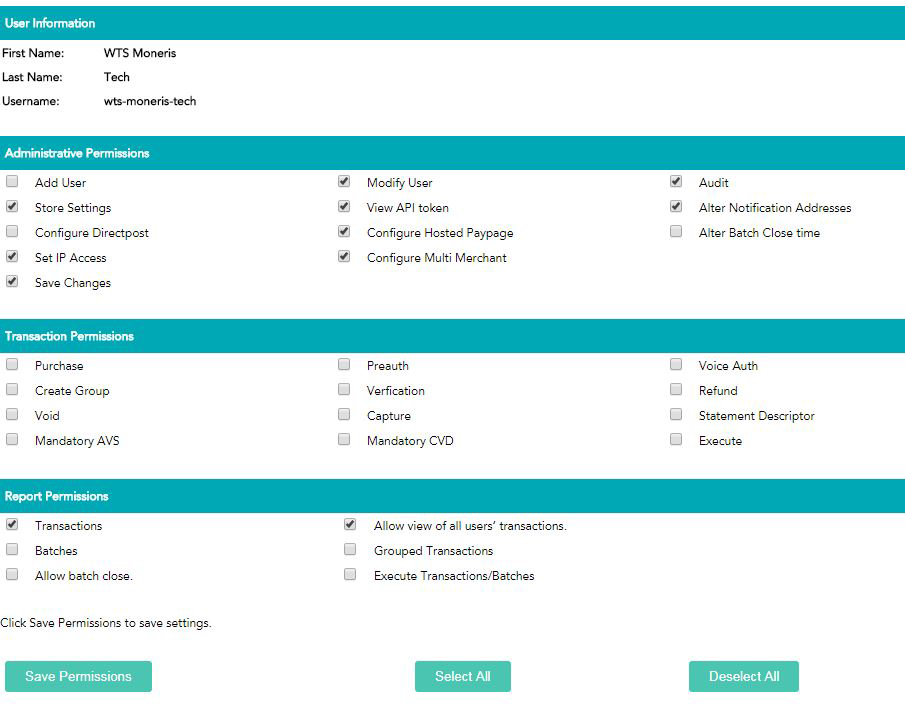
- For Administrative Permissions please select:
- Store Settings
- Set IP Access
- Save Changes
- Modify User
- View API token
- Configure Hosted Paypage
- Configure Multi Merchant
- Audit
- Alter Notification Addresses
- For Transaction Permissions, leave all blank.
- For Report Permissions please select:
- Transactions
- Allow view of all users transactions. - This is to help us troubleshoot any future issues.
- Click Save Permissions.
5. Continue and Sign Out
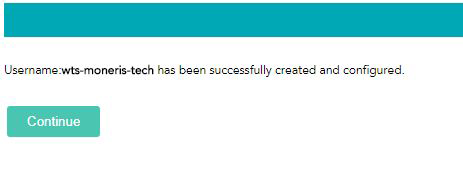
- Click Continue.
- Sign out of the application using the LOG OUT button in the upper right.
6. Securely Deliver Temporary Password to WTS
Please call your WTS contact with the temporary password.
Published on and maintained in Cascade CMS.


