Access
Use the General Student Computing Lab (Genlabs) - Learn about how to use General Student Computing Labs (Genlabs).
Every active student at Western has a user account to access the General Student Computing Labs (Genlabs). Your user ID is the same as your Western Identity, which is used for Western email and OWL access.
For more information about your access to Genlabs, please see General Student Computing Labs (Genlabs) User Accounts
Get a Western Identity - Learn how to get a Western Identity
Introduction
Your Western Identity is your key to central services at Western and consists of your User ID and Password. This identity is assigned to you upon application to Western as a student or when you become an active employee of the university and cannot be changed. Your Western Identity is used as a central authentication source, granting you access to a wide variety services.
Eligibility
At Western all students, student applicants, faculty and staff members are provided with a Western Identity.
Active Western staff may request access for special affiliated individuals. Please contact Human Resources for more information.
See Also
Release/Renew my Network Lease - Learn how to release and renew your Network Lease.
Introduction
This document gives instructions about how to release or renew your network (DHCP) lease on the mobile computing domain (i.e. Public and RezNet ports).
Requirements
Your machine must have TCP/IP installed.
The TCP/IP must be configured for using DHCP to gain access to the UWO Campus Network from a RezNet or Public port otherwise the port will get locked.
Troubleshooting Problems
If you did not get an IP Address that starts with 129.100 but rather an IP Address that starts with 192.168 , it means that either:
1. this computer is not registered to use a Public port. To register your computer in order to get full network access, please contact the Help Desk at x83800.
2. there were problems with the Release, Renew or connections to the network.
Check that DHCP is set up and running correctly.
If still have problems, note down the DHCP information (IP Address assigned, Adapter Address (MAC address), DNS servers, Default Gateway address, etc.). Contact the Help Desk and give them this information.
Note: Some operating systems will hold onto any previous lease information if they can't communicate with the DHCP server. If there is a long delay during lease renewal there is a good chance that has happened and you did not get the correct IP Address.
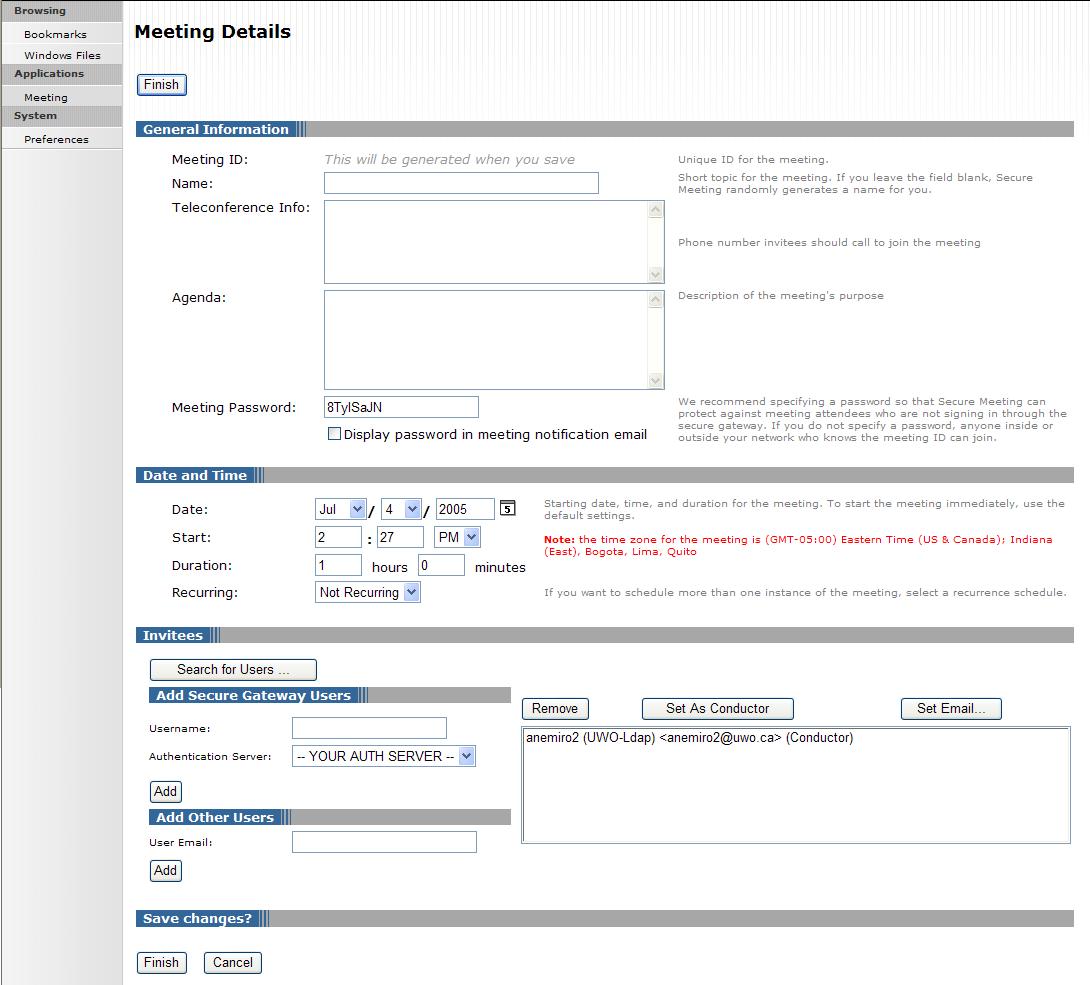
Use Secure Meeting - Learn how to use a secure meeting.
General Information
Name - A specific name, used to differentiate between meetings
Teleconference Info - in case you were also doing a voice teleconference in conjunction with the Secure Meeting session
Agenda - To let attendees know what you will be discussing ahead of time
Password - You may pick a password of your own choosing or use the system generated one that is provided already. There is a checkbox here allowing you choose whether or not the password for the meeting is sent in the notification email.
Date & Time - This is covered in the Recurring Meetings section below.
Invitees - You can click on the Search for Users... button to bring up the following screen.
You can either use the Local or LDAP tab to search for users
- Local only appears to find users is the VPN Administrators group or in the list of local users on the machine you are using.
- LDAP appears to search the entire LDAP directory of staff and students.
You can also add users from the Add Secure Gateway Users section. Just type their username into the Username field and clicking on the Add button. This section adds people from all groups including LDAP.
The Add Other Users section allows you to add non-UWO users to your meeting, all you need to do is insert their email address into the User Email field and click on the Add button.
- Save Changes - click on the Finish button at the bottom of this page to save all your changes and additions.
- Meeting Time
- Meeting Date
- Agenda and Teleconferencing Information
- Meeting Password (if selected in Meeting Details)
- Meeting Venue (the URL to log into the meeting)
- Compatibility test link
- Meeting Conductor's username
- Share my Desktop shares your desktop and all applications.
- Share Application(s) lets you choose only specific Applications to share so that the remote requester cannot access everything on you computer.
- Deny is used to deny the request if you do not wish to allow control of you computer by someone else in the meeting.
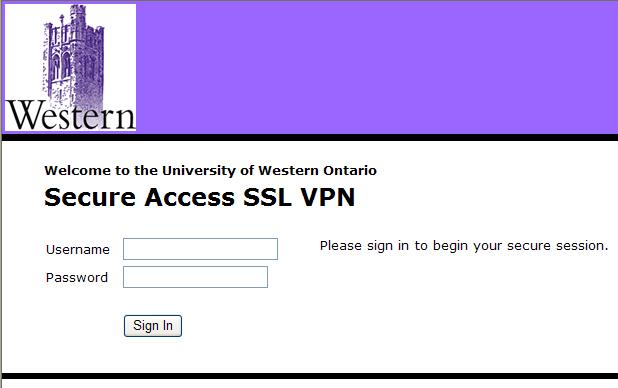
First you must log into the Secure Access SSL VPN at this address https://remote.uwo.ca
Setting up your Meetings
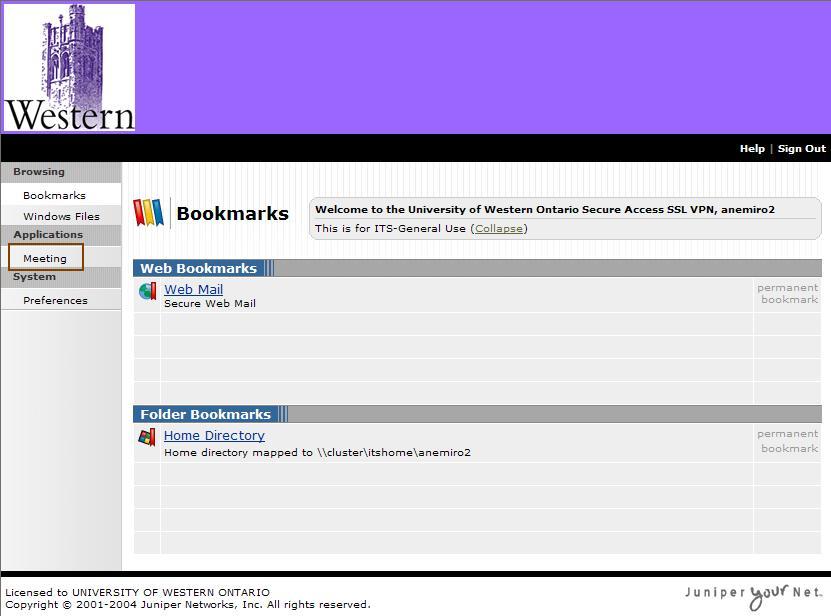
This takes you to the main VPN screen where you have a number of options in the left-hand bar to choose from. In this case we will be clicking on Meeting.
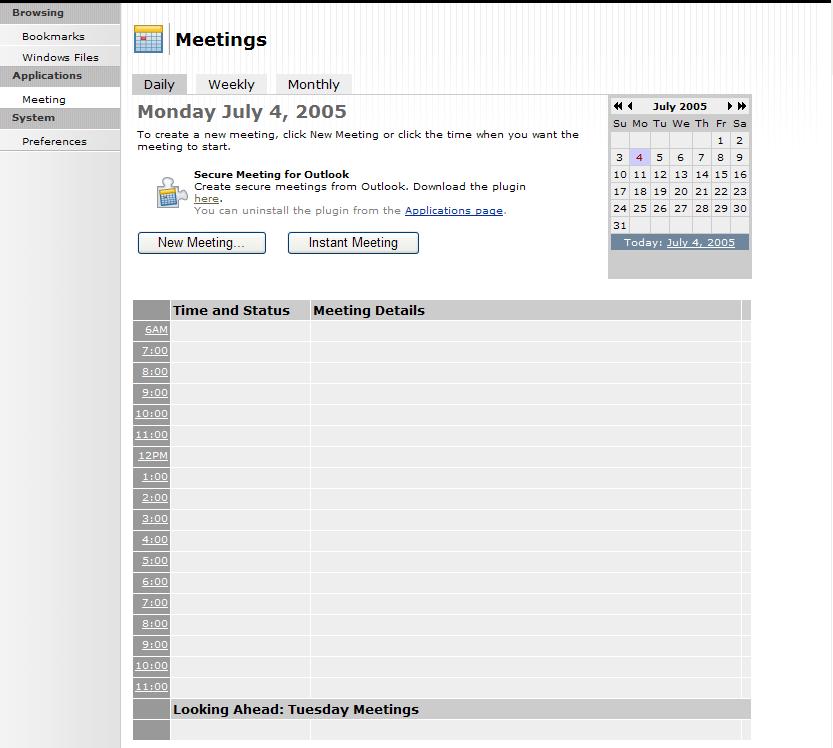
This takes you to the main calendar screen where meetings are scheduled and started from.
Instant Meetings
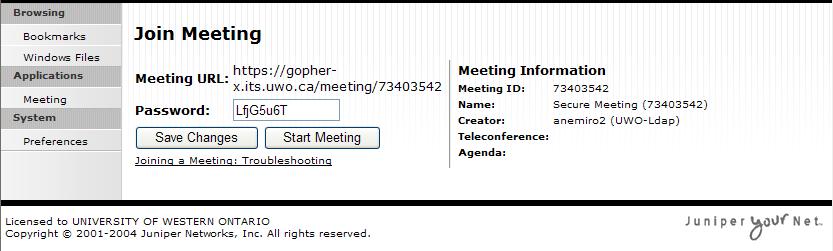
Instant meeting allows you to arrange and start a meeting at any time. The system provides you with a URL to provide to anyone looking to join the meeting along with the correct password for them to enter the meeting as illustrated below.
Just click on the Start Meeting button and wait for other people to join the meeting.
Scheduled Meetings
Scheduled meetings allow you to plan a meeting days, weeks, or months ahead of time where you know you will need to collaborate on the computer from two different sites.
This type of meetings allows for more customization and allows you to pick the people you would like to have access to the meeting and send them a notification.Click on the New Meeting button to open the following screen.
As you can see there are more areas that you can complete here:
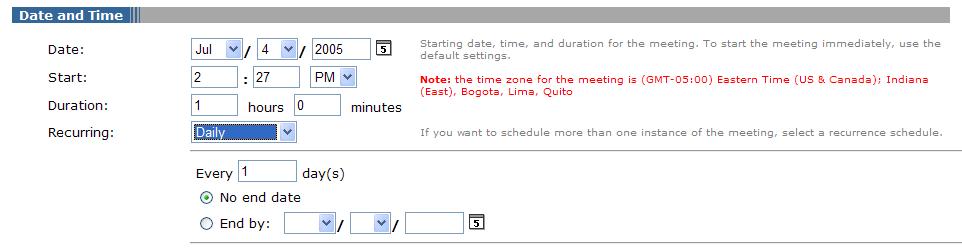
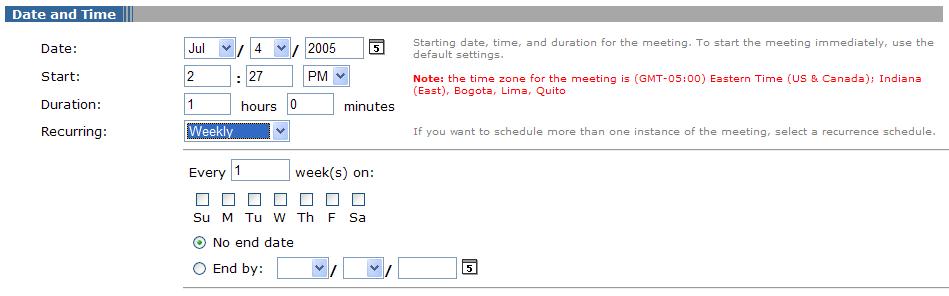
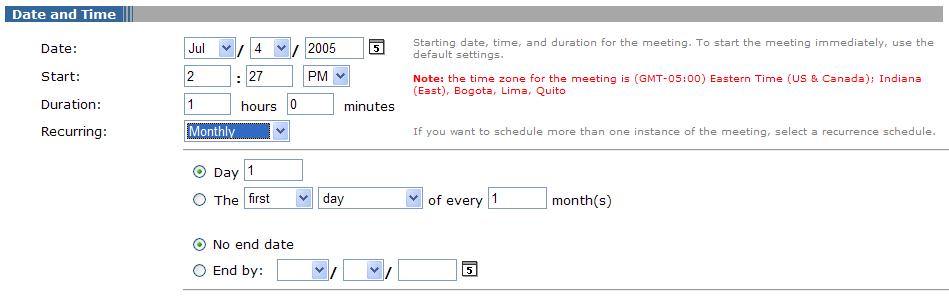
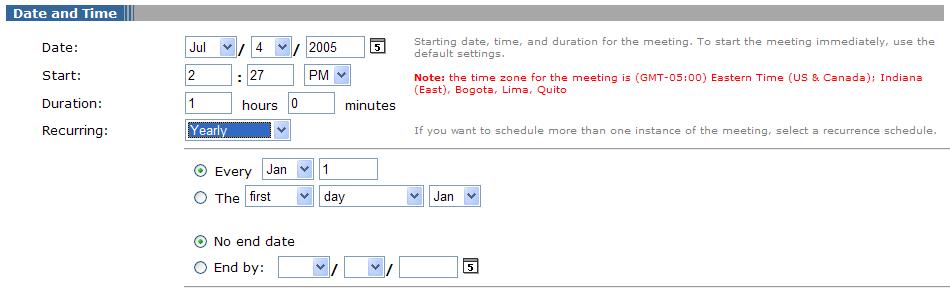
The Date and Time section in the Meeting Details window allows you to schedule a meeting for one time as well as a recurring option that allows you to regularly schedule meetings that occur on a daily, weekly, monthly or yearly basis.
One Time Only
This is a basic setup, where you pick the date, the Start time, the Duration and you leave the Recurring setting at Not Recurring.

Recurring Meetings
Daily RecurringWith the Daily recurrence option selected you can pick how many days there are between meetings, as well as how many times this meeting will continue on for.Weekly RecurringWith the Weekly recurrence option selected you can pick how many weeks between meetings as well as what days of the selected weeks these meetings are held on with or without an expiration on the number of recurrences of this meeting.Monthly RecurringWith the Monthly recurrence option selected you can pick meetings for a specific day of each month such as the first or fifteenth, or by specific days such as the last Thursday of every 2nd month. You also pick how long this recurs for if there is a limit.Yearly RecurringWith the Yearly recurrence option selected you can pick recurrences based on a certain day in a certain month of each year, along with how long this meeting will recur.When a meeting is booked with specific Invitees added, a notification email is sent to everyone, including the person who booked the meeting. An example is shown below:
Notification to Users
The emails shows:
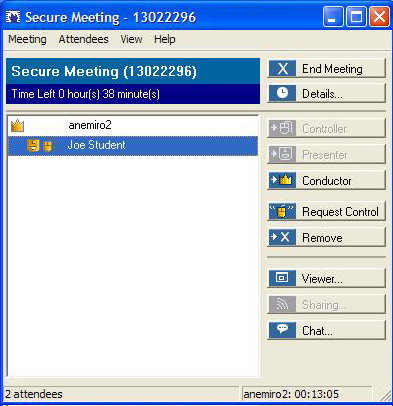
This section will explore how a meeting is actually run once it is setup and running.
This is the main meeting window where all invitees will be listed along with the Conductor for the meeting.
The buttons along the right hand side are the controls you will use throughout the meeting.
Meeting Functionality
The Meeting Window
The tool bar at the top of the window duplicates some of these controls and has some others that will be discussed below.
Controller Button
The Controller button is used in conjunction with the Presenter button to designate who is showing their screen to everyone. It is automatically activated at the same time the Presenter button is clicked on for a different user.
Presenter Button
The Presenter button is used to designate who's screen is being shared amongst everyone. It is also the first step when the controller wants to take control of someone's computer remotely for troubleshooting or demonstration purposes.
Conductor Button
The Conductor button is used to designate the controller for the meeting. It is not generally used as the person organizing the meeting will normally remain the controller throughout the meeting.
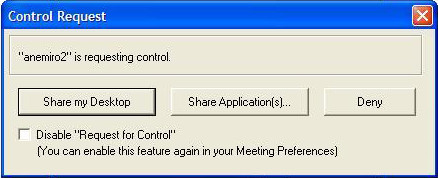
Request Control Button
The Request Control button is used to request control of another users computer. To activate this button the Controller of the meeting must make the person's who's desktop/application you want to control the Presenter/Conductor. This will activate this button. The person who is being sent the request will see the screen below:
Share my Desktop, Share Application(s), and Deny.
As you can see there are three options here:
Remove Button
The Remove button is used to remove people from the meeting. The conductor clicks on the user's name in the Meeting Screen and then clicks on the Remove button.
Viewer Button
The Viewer Button will open up the Viewer window which allows users to see the Desktop or Application(s) that is being shared. It will open up a second window which can be resized or scrolled independently. It is also the window that a user controls someone else's desktop through.
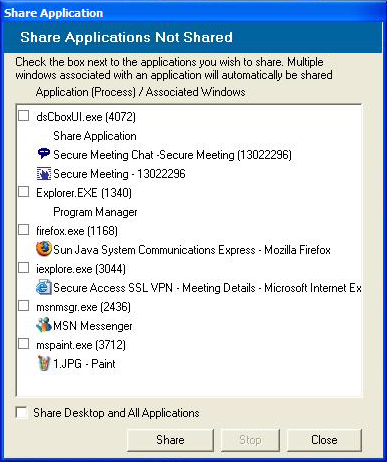
Sharing Button
The Sharing button is used to setup Sharing of your Desktop or Application(s). By clicking on it you will see the following screen open up:
Share Desktop and All Applications
From here you can either select particular applications to share or you can click on the
Share
and then click on the
Stop
button. To stop sharing your applications or desktop just click on the
button.
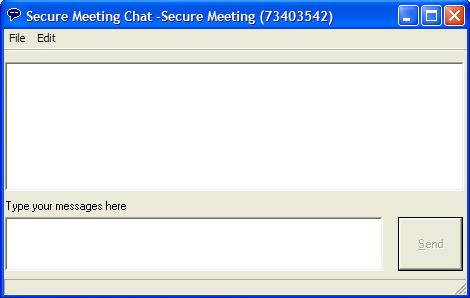
Chat... Button
The Chat Screen allows all of the users to chat with each other about what is happening on screen. Just click on the Chat button to open the chat window below:
Top Tool Bar
The ToolBar at the top of the screen allows you switch between all of the various Secure Meeting screens as well as the Whiteboard functions.
Draw
When you click on the
option, the various drawing options become active. When the presenter uses these tools, all of the people viewing his screen through the viewer window will be able to see what he is drawing or pointing to.
Disclaimer: The provided instructions are for information purposes only. Neither The University of Western Ontario nor the Division of Information Technology Services assume any responsibility for loss of use or damage to a computer system (including any data or software contained within the computer system) which is the result (directly or indirectly) of the application of these instructions.

Use Western ROAMS - Learn how to use Western ROAMs to remotely access UWO accounts.
To learn how to set up and configure Ivanti and its features, please visit our specific WROAMS How Do I Documentation.
Published on and maintained in Cascade.