Transfer Local Folders to Office 365
Introduction
This page explains how to transfer local folders to Office 365. Local Folders are folders storing email messages that are saved only on your own computer. They are also known as Archives or Personal Folders.
This document will guide you through moving local folders into Office 365.
- If you used POP to access your email, you have local folders.
- If you have email messages that only show on your computer and not in Office 365, you have local folders.
Backup Local Folders into a PST file
In computing, a Personal Storage Table (.pst) is an open proprietary file format used to store copies of messages, calendar events, and other items within Microsoft Outlook.
Outlook 2013
2. Click "File".
3. Click "Open & Export" on the left.
4. Click "Import/Export".
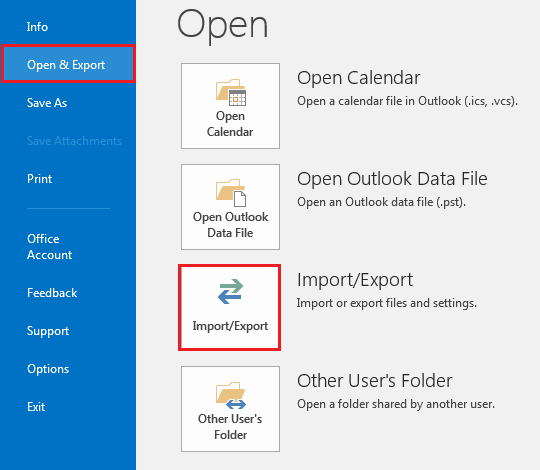
Fig. 1
5. Select "Export to a file", click "Next".
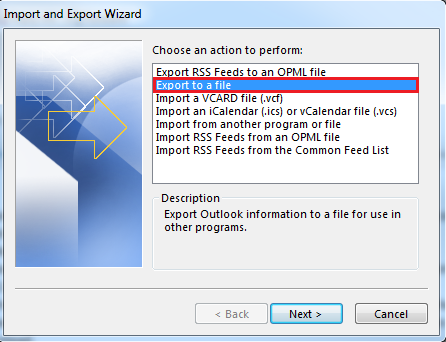
Fig. 2
6. Select "Outlook Data File (.pst)", click "Next".
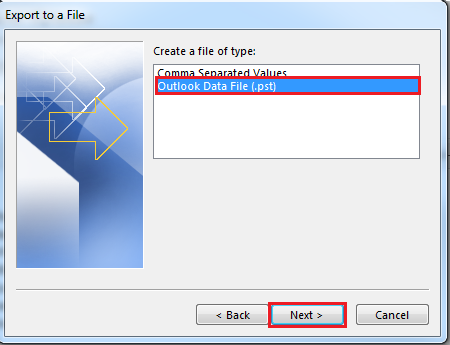
Fig. 3
7. Select your @uwo.ca email address to backup your emails, or select Outlook Data File to backup personal contacts and local folders.
8. Click "Next".
9. Click "Browse" and choose a name and location to save your .pst file, click "OK".
10. Click "Finish".
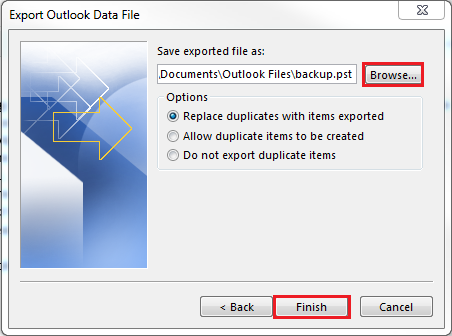
Fig. 4
Importing Local Folders into Office 365
Note: You must setup your Office 365 account in a desktop client before you can import your local folders. For instructions on configuring Office 365 in a desktop client, please go to https://wts.uwo.ca/office_365/email/index.html and see the section called Desktop Setup Guides.
Outlook 2013
1. Start Outlook 2013
2. Click File
3. Click "Open & Export" on the left
4. Click Import/Export
5. Select "Import from another program or file"
6. Select "Outlook Data File (.pst)", click Next
7. Click Browse and navigate to your saved .pst file from Step 1, click Next
8. Select "Import items to the same folder in" and make sure your Western account is selected in the drop-down
9. Click Finish
Published on and maintained in Cascade.