
Extron MLC226 – Push Button – multi row
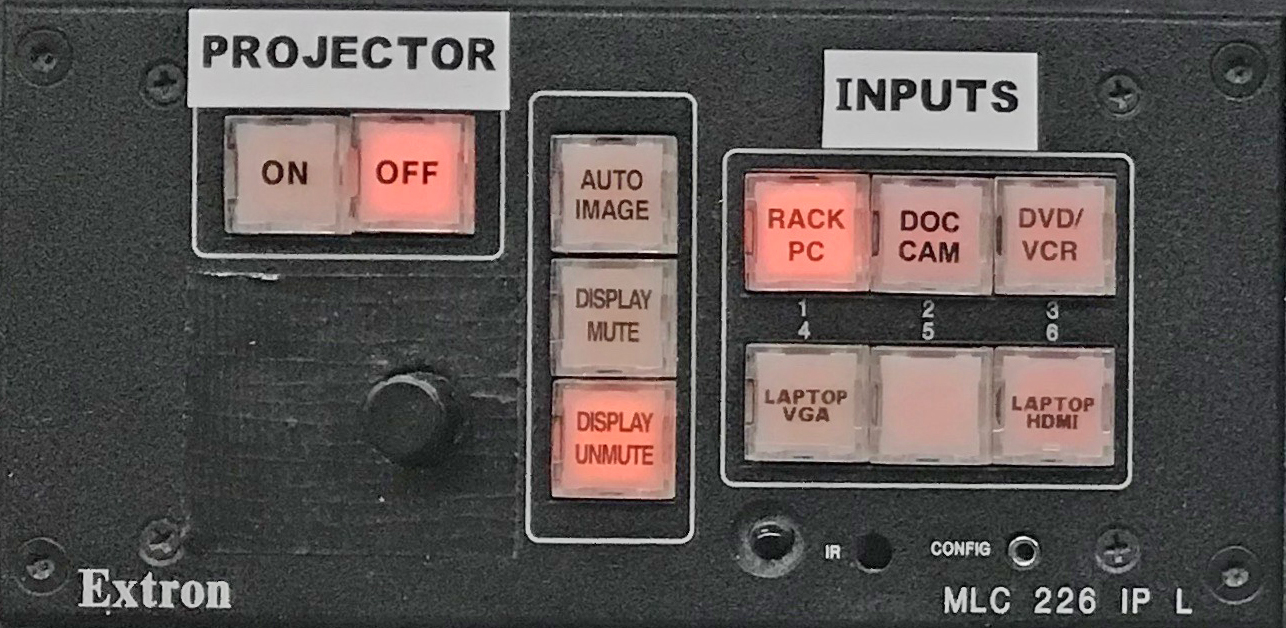
The Extron MLC 226 presentation switcher serves as the projector control interface in some G.U. Classrooms. The MLC 226 switcher can be identified by alternate groupings of small vertical and horizontal square, white, push-buttons
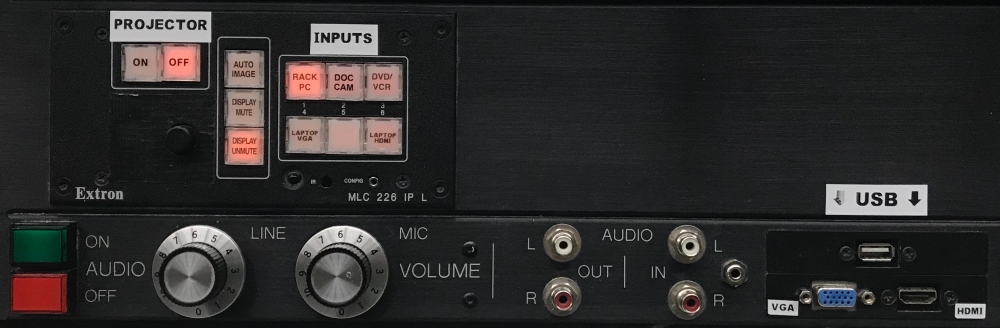
Projector Control
- Press the "ON" button on the Switcher to turn on the projector.
- Wait until the "ON" button stops flashing before pressing any other buttons.
- Press the "INPUT SELECTION" button that corresponds with the video source that you want to use:
- Rack-PC
- Doc Cam (Document camera, where applicable)
- DVD/VCR
- Laptop VGA
- Laptop HDMI (where applicable)
- When you are finished press the "OFF" button on the Switcher.
Note: Pressing an "INPUT SELECTION" button alone will not turn on that particular device. You will first need to independently power up each source device you want to use before it can be displayed
Analog Audio Control
On the separate a/v control panel:
- Press the green "ON" button to turn on the audio system.
- Turning the "Line" knob adjusts the master audio level for all program sources (Rack-PC, Laptop, DVD).
- Turning the "Mic" knob adjusts the master audio level for all microphone sources.
- When you are finished press the red "OFF" button to turn off the audio system.

Published on and maintained in Cascade.