
Photo Credit: Rim Zakaria; Turnitin
Instructor Guide: Creating Turnitin Courses and Submitting Student Papers
Added on June 1, 2026 by Rim Zakaria
This guide explains how instructors can:
- Create a course directly in the Turnitin portal (outside of OWL Brightspace)
- Submit an assignment on behalf of a student
Part 1: Create a Course in the Turnitin Portal
Instructors can create and manage Turnitin courses directly through the Turnitin website without using OWL Brightspace integration.
Step 1: Access the Turnitin Portal
- Go to the official Turnitin website.
- Enter your instructor credentials and click on Log in.
If instructors are experiencing issues logging in to the Turnitin portal, reset your password by clicking on "Forgotten your password? Click here." or please get in touch with the WTS Helpdesk for further support.
Step 2: Create a New Course
- From the Instructor Homepage, click the green button labelled +Add Class.
- Enter the following course information:
- Class type - You have a choice between "Standard" and "Master". For a regular class with one instructor, select "Standard".
- Class name - The class name will appear on instructor and student homepages.
- Enrollment key - The enrollment key is typically created by the instructor and must be between 4 and 20 characters long. Students use this enrollment key to join the class on Turnitin after it's created. You can view or change your enrollment key by editing the class.
- Subject area(s) - e.g. science - The dropdown provides several options, and you may select more than one (clicking the "x" next to a selection will remove it). Choose "Other" if you don't find your subject area in the list.
- Student level(s) - e.g. postgraduate - You can select more than one. Clicking the "x" next to a selection will remove it.
Class end date
- Click on the Submit button.
Class information will be displayed in a pop-up window containing the ID and enrollment key for confirmation. The course will now appear on your Turnitin instructor dashboard.
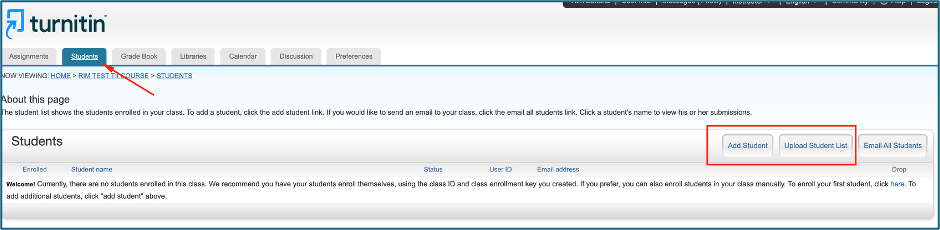
To add students to the newly created class, while in the Turnitin class, click on the "Students" tab. Select either "Add Student" or "Upload Student List" to add the students to the class. For further information on adding students, please refer to 4th section/accordion title 4. Add Students on this page: https://www.turnitin.com/self-service/getting-started-instructor
Step 3: Create an Assignment
- From your Turnitin Instructor dashboard, open the course you created
- Click the green button labelled +Add Assignment
- Fill in the assignment details:
-
- Title - The name of the assignment.
- Instructions - An optional space to provide a description or instructions for the assignment to your students. The instructions box has a character limit of 1,000.
- Max Grade - The maximum number of points that can be awarded to a submission.
- Start Date - The date that students will be able to begin submitting to the assignment.
- Due Date - The date by which students can no longer submit the assignment.
- Feedback Release Date - The date that any grading and feedback is visible to students.
- Submit papers to – you can either select "Standard paper repository" or, if you do not want the papers to be indexed, "Do not store the submitted papers".
- Enable PeerMark - Attach PeerMark to the assignment for students to peer review each other's work.
- Further customize your assignment with optional settings relating to the "Similarity Report" and grading and feedback.
- Click on the Submit button.
Your assignment is now available for student submissions.
Part 2: Submit an Assignment on Behalf of a Student
After Part 1, instructors can now upload submissions to Turnitin on behalf of students when necessary.
Step 1: Submit an Assignment on Behalf of a Student
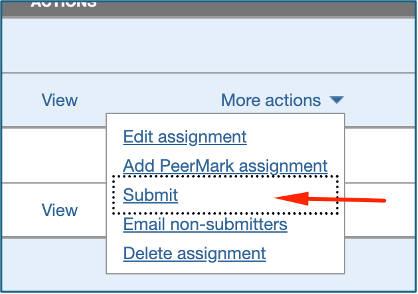
- On the TII class homepage, locate the target assignment.
- On the far-right under the assignment, click on More Actions > Submit
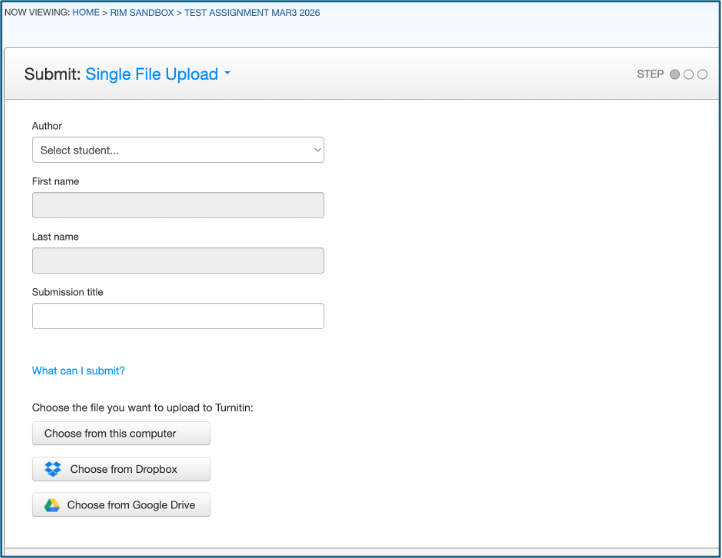
- You will be directed to the assignment submission page below:
- Select one of the upload options from the drop-down:
- Single-file upload- upload a document for one student
- Multiple file upload- upload multiple documents for multiple students
- Cut & paste upload- cut and paste text from a document to upload for one student
- Zip file upload- upload one zip file of documents for multiple students
- Select a student from the author drop-down. The form will automatically fill in the first and last name for you if the student is enrolled in this class.
- Add a title for the submission.
- Based on the upload option selected, either paste the submission text into the text box provided or upload the submission file(s). Click on Upload.
- Review the documents, preview, and/or student details that have been added. If a mistake has been made and you do not want to upload the submission, click on Cancel.
- Click Confirm to complete the submission.
- The submission will now appear in the assignment inbox.
More information about submitting on behalf of a student can be found here: https://guides.turnitin.com/hc/en-us/articles/26723632922765-Submitting-on-behalf-of-students