Contacts
Import Personal Contacts
Procedure
Outlook Web Access (OWA)
- Go to myoffice.uwo.ca and login
- Click "Outlook"
- On the bottom left corner, click on the People icon
- Click the Settings icon in the top right corner and click Options
- Click Import Contact on the left
- Click "Outlook 2016 or 2019"
- Click the Browse button and locate the .csv file containing your contacts from before you were migrated
- Click the Upload button
Outlook 2016/2019
- Go to Address Book
- Click File
- Click Open & Export
- Click Import/Export
- Click "Import from another program or file"
- Click Outlook Data File (.pst)
- Browse to your saved .pst file containing your contacts, click Next
- Click Finish
Backup Personal Contacts
Procedure
Outlook 2016/2019 - CSV
1. Select File | Open & Export | Import/Export (Figure 1)
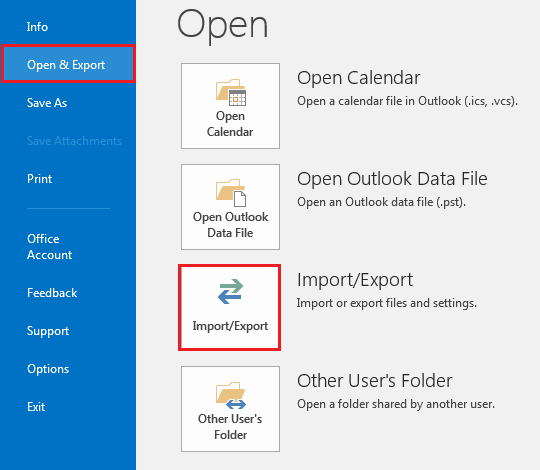
Fig. 1
2. Select Export to a file and click Next.
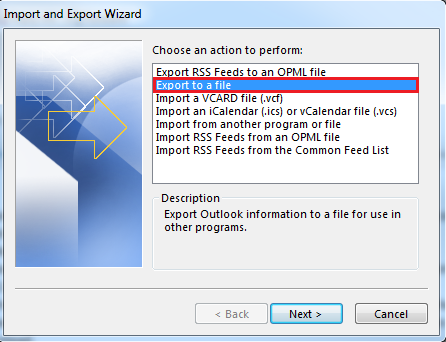
Fig. 2
3. Select Comma Separated Values and click Next.
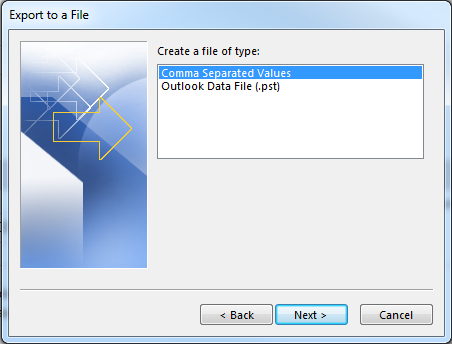
Fig. 3
4. Under the Outlook Data File - Select your Contacts folder and click Next.
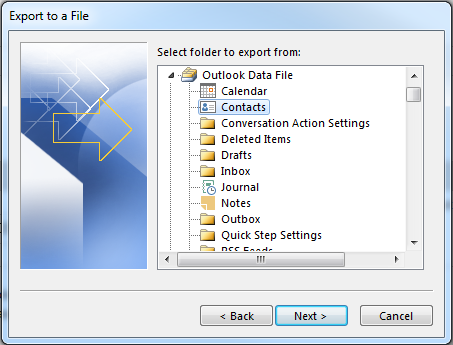
Fig. 4
5. Enter the filename in the Save exported file as: field and click Next.
6. You will then see a window explaining that your Contacts will be exported.
7. Click Finish.
Your CSV file has now been created
Outlook 2016/2019 - PST
1. Select File | Open & Export | Import/Export
Fig. 1
2. Select Export to a file and click Next.
Fig. 2
3. Select Outlook Data File (.pst) and click Next.
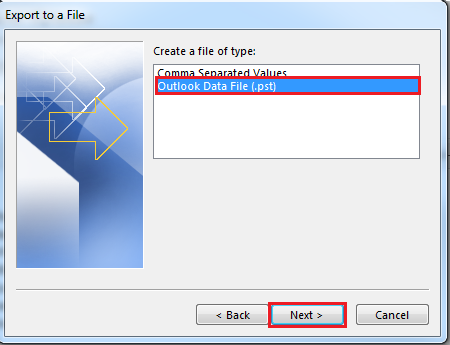
Fig. 3
4. Select your Contacts folder and click Next.
5. Enter the filename in the Save exported file as: field and click Next.
6. Enter a password for your PST file if desired, click OK
Your .pst file has now been created
Mac Mail
- Open the Mac Address Book and go to "File" and click "Export"
- Select "Address Book Archive"
- Type a file name in the "Save As" field
- Remember where you save the file and click "Save"
Import Autocomplete Data
Procedure
Outlook 2016/2019
After setting mail up via Exchange in Outlook 2016/2019, go to Mail and send yourself an email
- Open Windows Explorer
- Paste C:\Users\%username%\AppData\Local\Microsoft\Outlook\RoamCache in the address bar at the top, hit Enter
- Find the file starting with Stream_Autocomplete_0_
- Right click the file and click "Rename"
- Highlight and Copy the long string of letters and numbers
- Find the Stream_Autocomplete_0_ file you saved previously. Right click it and click Rename
- Paste the new string of letters and numbers overtop the existing ones (so the file have the same names)
- Copy the file from your Desktop, Paste it into the \RoamCache folder
- When prompted, select Copy & Replace
Backup Autocomplete Data
Procedure
Outlook 2016/2019
Saving the Autocomplete Data
- Open Windows Explorer
- Paste C:\Users\%username%\AppData\Local\Microsoft\Outlook\RoamCache in the address bar at the top, hit Enter
- Find the file starting with Stream_Autocomplete_0_
- Right click and Copy it
- Go to your Desktop and Paste the file
Using Western Directory
Procedure
Information available in Western Directory
- Name
- Department (under the "Organization" heading)
- Phone number and extension (under the "Phone Number" heading)
- Building and room number (under the "City" heading)
NOTE: The Address Book only shows the primary department, phone and location, even if a person has multiple assignments. To view a person's full information including all their roles, use the web page search.
Add the Western Directory to Outlook
- Click File --> Account Settings
- Click the Address Books tab
- Click New
- Select Internet Directory Service (LDAP) and click Next
- Enter directory.uwo.ca in the Server Name field and click More Settings
- Click on the Search tab
- Select Custom and enter dc=uwo,dc=ca in the Search Base field
- Check Enable Browsing (requires server support)
- Click Apply, then click Next and Finish
- Restart Outlook and the directory will appear in Address Books
If you already have Western Faculty/Staff Directory configured in Outlook
If you already have an entry for UWO Faculty/Staff Directory (the pilot directory since 1998), you can edit this entry to use the new Western Directory as follows:
- Select Accounts from the Tools menu. (The entry for UWO Faculty/Staff Directory should appear in the list)
- Click on UWO Faculty/Staff Directory and click properties
- Change the Description box to say Western Directory instead of UWO Faculty/Staff Directory
- Select the Advanced tab.
- Change the Search base to dc=uwo,dc=ca instead of o=uwo,c=ca
- Leave the rest of the information as it is
Using the Address Book in the New message window
- When in the New message window, enter the name you wish to search for in the To: or Cc: field.
- Then select Check Names from the Tools menu. This can also be accomplished by pressing Ctrl+K
- If there is only one match it will replace the To: field with the persons full name, however if there are multiple matches it will bring up a window where you can select the proper person.
Accessing the Address Book anywhere in Outlook
- Select Address Book from the Tools menu.
- Click the Find People button.
- Select the Western Directory from the list of Directories
- Enter the name you are searching for in the Name box.
- Click the Find Now button.
- It will open a window that shows all names that match your criteria.
Web page interface to the Directory
You can also perform more sophisticated searches and get much more information by using the web interface to the Western Directory. Searches can be made by name or unit.
Published on and maintained in Cascade.