Wireless
uwosecure-v2 and eduroam
MacOS - Explains how to connect to the uwosecure-v2 network on Mac Sierra (10.12) and up
Introduction
This document will help you setup uwosecure-v2 on MacOS.
Procedure
You will first need to make sure you are using Mac OS X version 10.12 or newer.
(To check this, click on the Apple button (in the upper left corner of your screen) and select "About this Mac." If it has version 10.10 but not 10.12, you can simply update OS X but clicking on the Apple button in the upper left corner of your screen and select "Software Update." This should bring your copy of OS X up to its latest version. You will need to perform this either at home with an internet connection, or hard-wired on campus.)
- Click on the Wireless Network symbol at the top right of your screen.
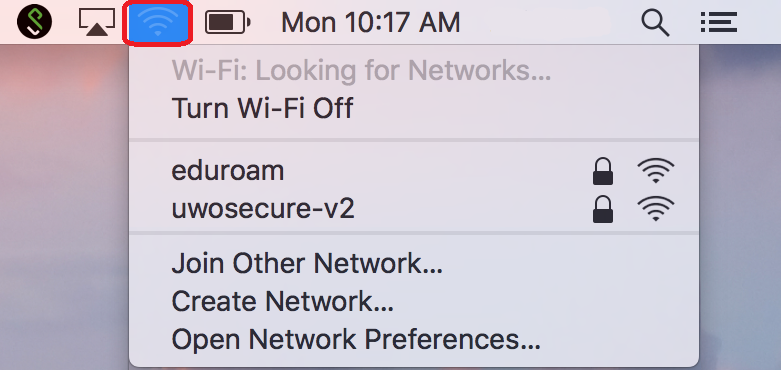
- Make sure your Wi-Fi is turned on.
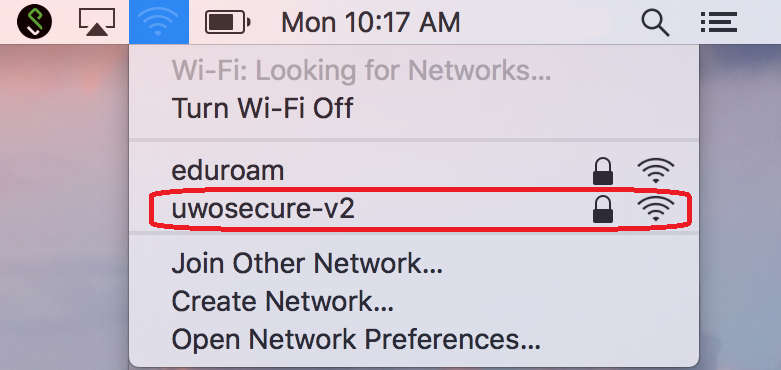
- Click on 'uwosecure-v2'.
- Change the following:
Mode: leave as 'Automatic'
Username: your Western user ID
Password: your Western password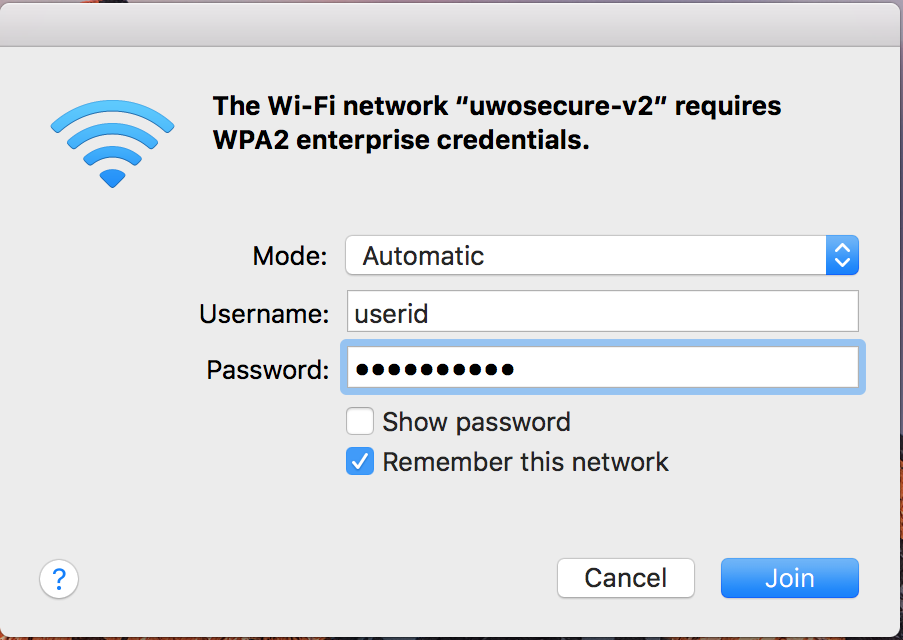
- Click 'Join'.
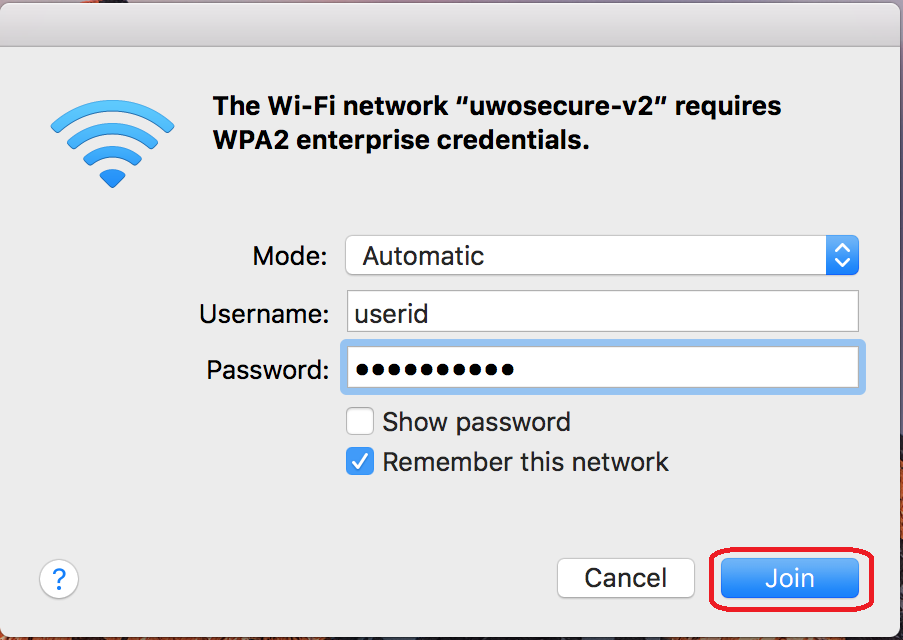
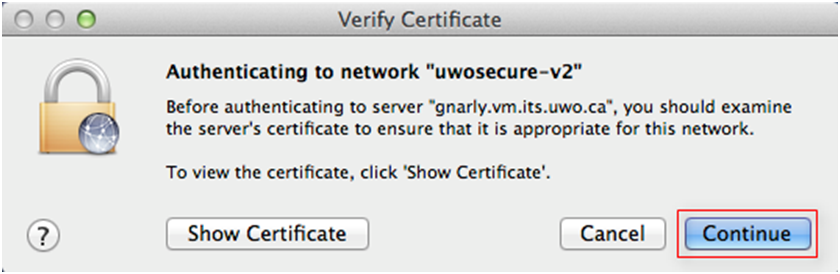
- An authentication certificate may pop up. If it does, click 'Continue'.
- You should now be connected to the 'uwosecure-v2' wireless network.
Windows 10 - Explains how to connect to the uwosecure-v2 network using Windows 10.
Introduction
This document outlines the configuration required for Windows 10 to connect to the uwosecure-v2 wireless network.
Procedure
- You can access the network list when logged onto a profile and viewing the Desktop. Select the Wireless Icon from the task bar in the lower-right to access the internet.

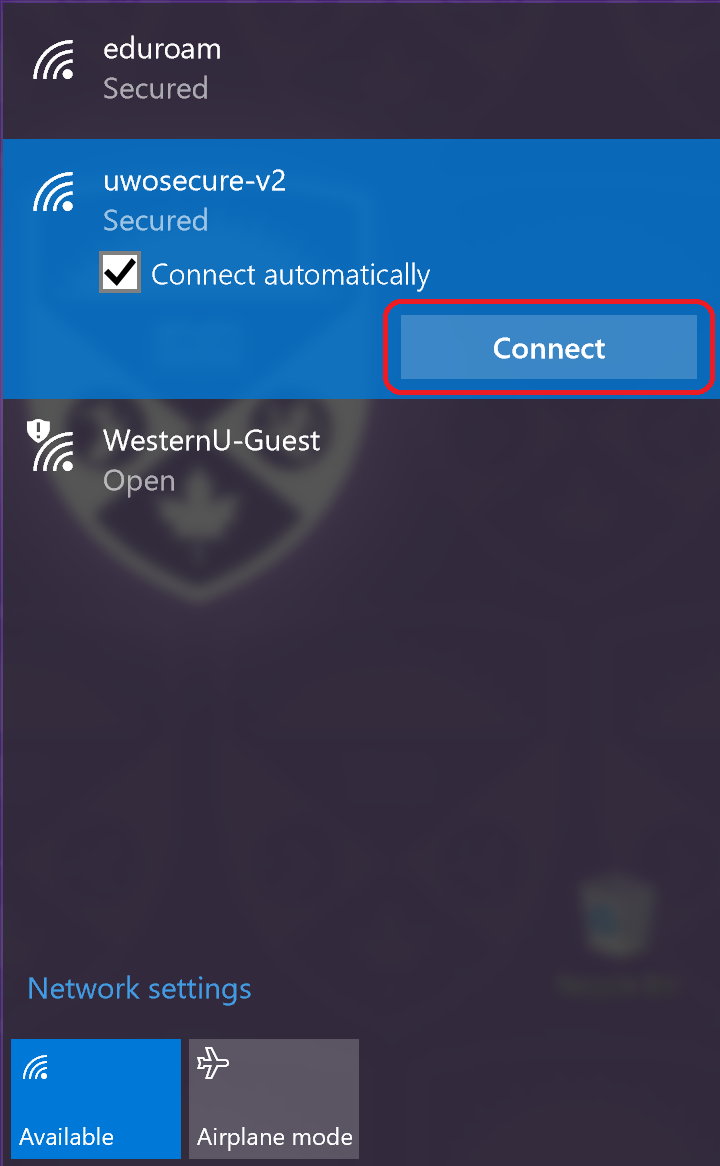
- Select 'uwosecure-v2' from the list of available Networks and select 'Connect'.
- Enter the following:
Username: your Western user ID
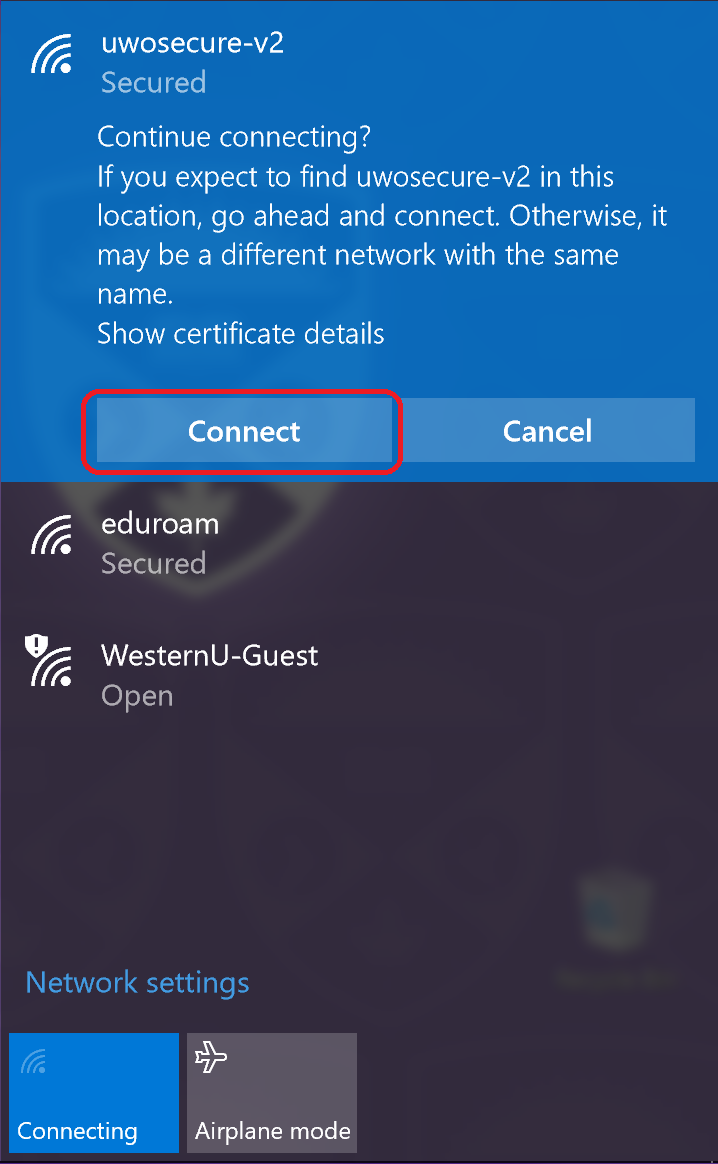
User password: your Western password - You will receive a message like the one below. If you do, simply click 'Connect'.
- You should now be connected to the 'uwosecure-v2' wireless network.
Linux-Ubuntu - Explains how to connect to the uwosecure-v2 network with Linux-Ubuntu.
Introduction
This document outlines the configuration required for Linux - Ubuntu 18 (Bionic) to connect to the uwosecure-v2 wireless network. Note: While these screenshots only apply to Linux - Ubuntu, the instructions are applicable for all versions of Linux.
Procedure
- Open the system menu from upper right corner of the screen.
- Select 'Wi-Fi Not Connected'. The Wi-Fi section of the menu will expand.
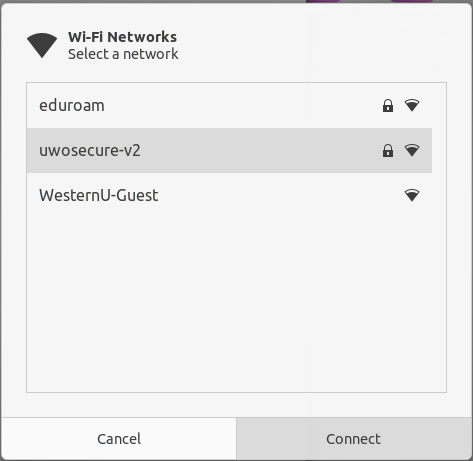
- Click 'Select Network'.
- Click 'uwosecure-v2'
- In the 'Wi-Fi Network Authentication Required' window, enter/select the following:
Security: choose 'WPA & WPA2 Enterprise'
Authentication: choose 'Protected EAP (PEAP)'
CA Certificate: choose 'Select from file...'
Within the 'Choose a CA certificate...' window:
Navigate to File System: /etc/ssl/certs
Look for 'USERTrust_RSA_Certification_Authority.pem' (if there are two, click on the first one only).
Click 'Open'.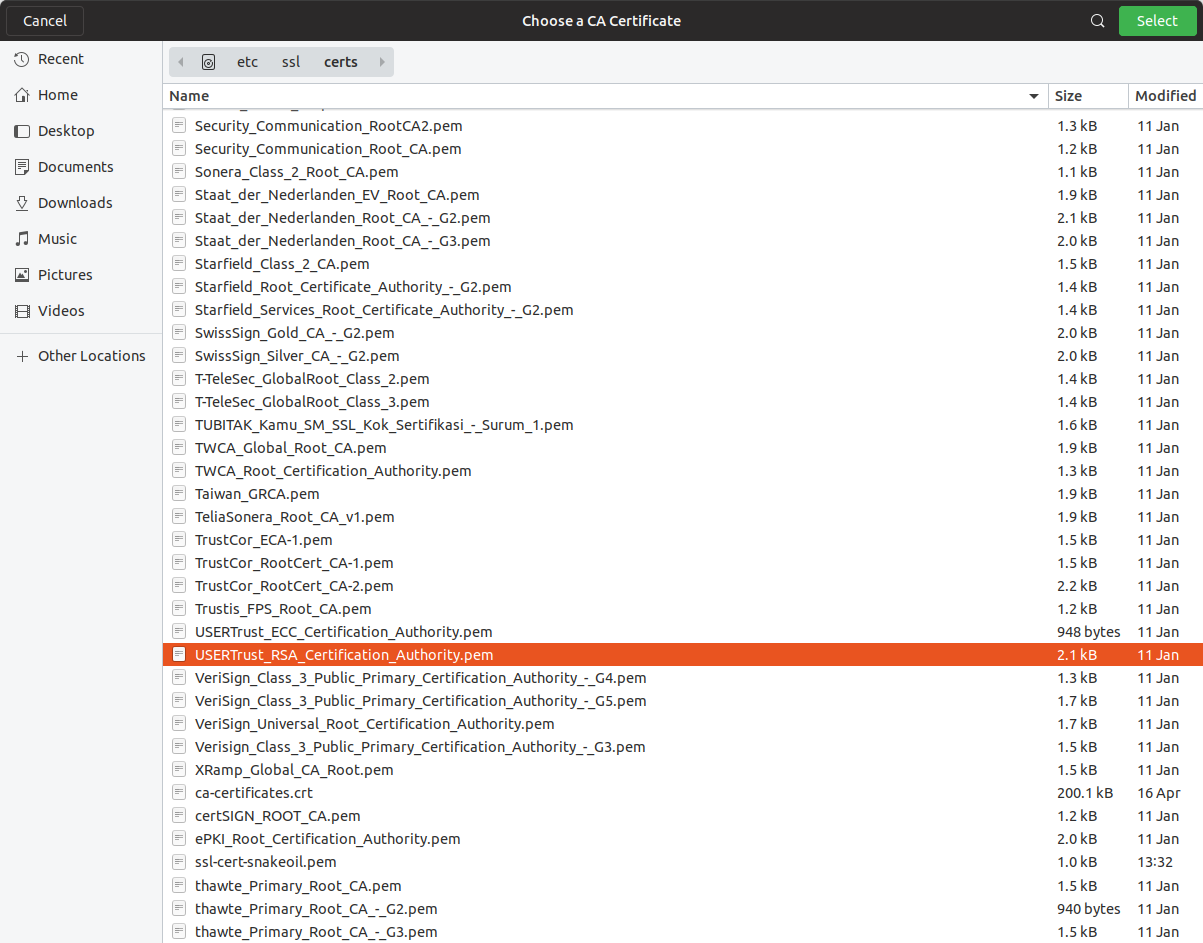
PEAP version: leave as 'Automatic'
Inner authentication: choose 'MSCHAPv2'
Username: your Western user ID
Password: your Western password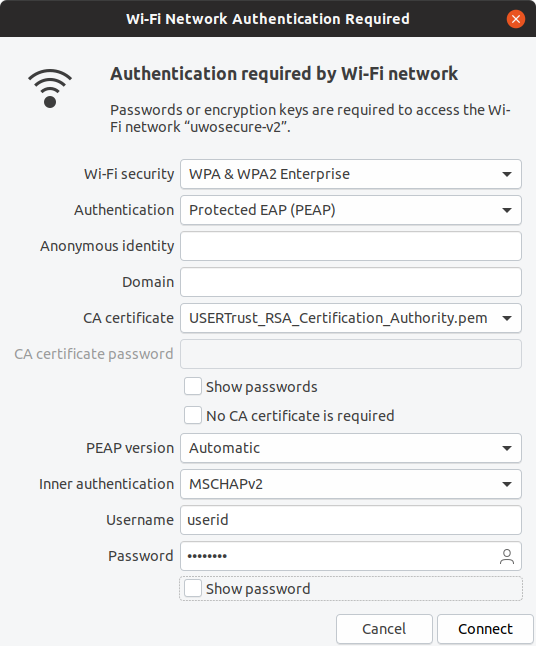
- Click 'Connect'.
Chromebook - Explains how to connect to the uwosecure-v2 network with a Chromebook
Introduction
This document outlines the configuration required for a Chromebook to connect to the uwosecure-v2 or eduroam wireless network.
Procedure
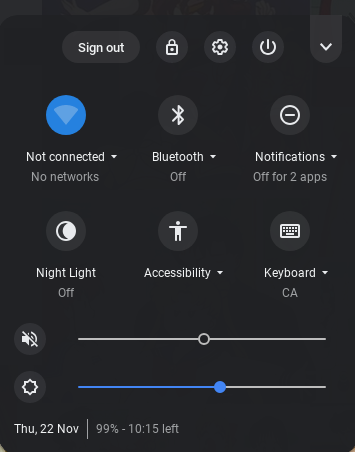
1. Click on the wireless logo located on the bottom right corner

2. Click on the wireless logo (located above the 'Not connected')
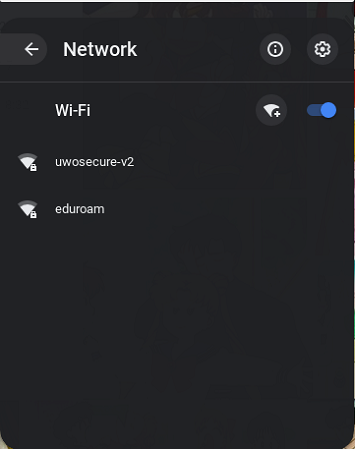
3. Select your preferred network (uwosecure-v2 or eduroam)
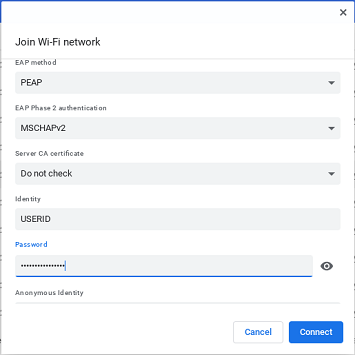
4. Configure as it follows:
EAP Method - PEAP
EAP Phase 2 Authentication - MSCHAPv2
Server CA Certificate - Do not check
Identity - for uwosecure-v2 enter your Western ID. For eduroam, enter your full Western email address
Password - your Western password
Anonymous Identity - not required - leave blank
Click on Connect.
iOS - Explains how to set up the uwosecure-v2 network on your iOS device (iPhone or iPad).
Introduction
This document outlines the configuration required for the iPhone / iPad to connect to the uwosecure-v2 wireless network.
Disclaimer: Some screens may appear differently depending on your device and version.
Procedure
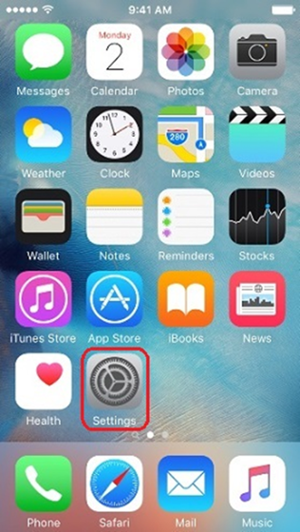
- Tap 'Settings'.
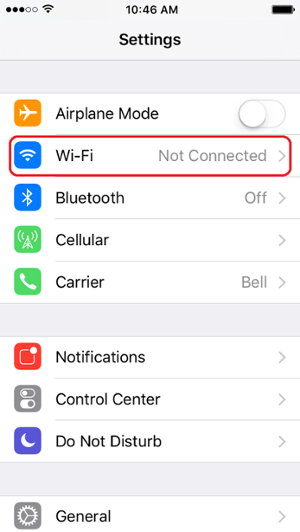
- Tap 'Wi-Fi'
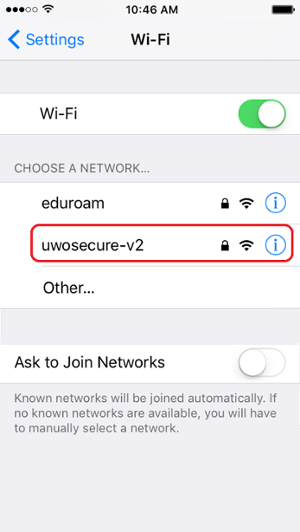
- Wireless signals that are in range are displayed in this area. You should see the 'uwosecure-v2' wireless network in the list.
- Tap 'uwosecure-v2'.
- Enter the following by tapping on each line of information:
Network Name: uwosecure-v2
Security: leave as 'WPA2 Enterprise'
Username: your Western username
Password: your Western password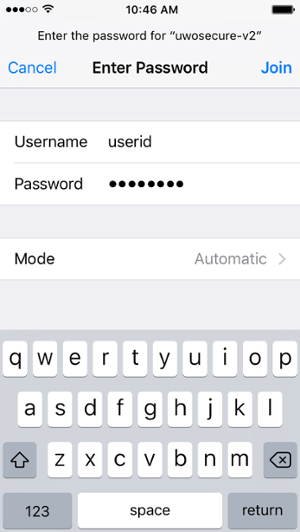
- Tap 'Join'.
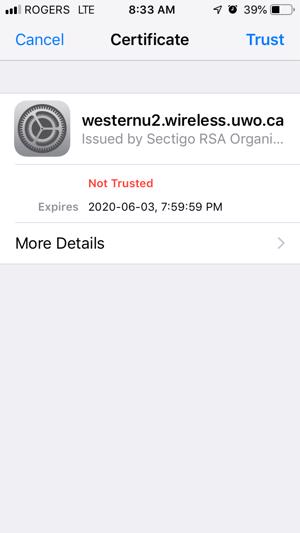
- Tap 'Trust' for the security certificate that is displayed (it make take a few seconds for the acceptance to process).
- There should now be a checkmark next 'uwosecure-v2' network. As well, the Wireless Connection symbol should appear at the top. This indicates that your wireless connection should now be active.
Congratulations, you are now connected to uwosecure-v2 wireless network!
Android - Explains how to set up the uwosecure-v2 network on your Android device
Introduction
This document will help you setup an Android device (phone or tablet) to connect to the uwosecure-v2 network.
Procedure
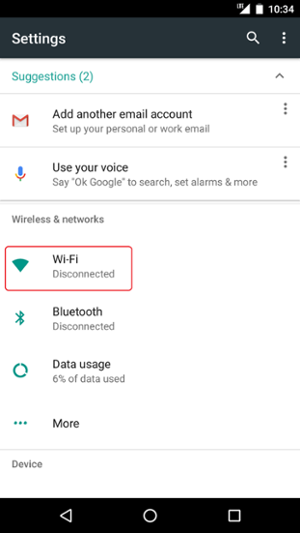
- Tap 'Settings'.
- Tap 'Wi-Fi'.
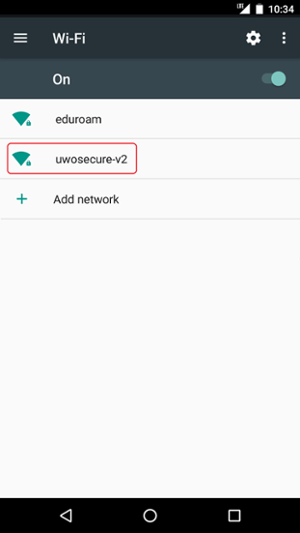
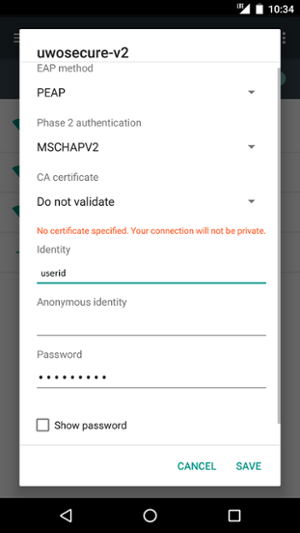
- Tap 'uwosecure-v2' to edit the settings.
- EAP Method: PEAP
Phase 2 Authentication: MSCHAPV2 (this setting is located under Advanced on some devices)
CA Certificate: Use system certificates
Online Certificate: Use system certificates or Do not validate
Domain: wireless.uwo.ca
Identity: your Western username
Anonymous Identity: leave blank
Password: your Western password - Click 'Save'.
- You should now be connected to 'uwosecure-v2' wireless network.
Create Single Guest - Explains how to create a Guest account for the WesternU-Guest network.
Introduction
A sponsor can create accounts to be used on the WesternU-Guest wireless network. These accounts will use a valid email address for the username, and a password with six random numbers.
Note: If you have already sponsored five or more accounts you can not use this function.
Procedure
- Go to the Sponsor sign In page: https://clearpass.wireless.uwo.ca/guest/guest_users.php
- Login with your Western user ID and password
- Select 'Create Account' on the top left.
- Under 'Guest's Name' Enter the name of the guest.
- Under 'Email Address' Enter the email address of the guest. This needs to be a valid email address.
- Under 'Auto Email' Select whether you want the guest to receive a 'Visitor account receipt' email from WesternU-Guest-Sys@uwo.ca containing a username and password.
- Under 'Account Activation' Enter the date and time the account will be activated. Leave this blank if you want the account activated now.
- Under 'Expires After' Select the amount of time the account will have wireless access for. The default is four hours with a maximum of 12.
- Accept the 'Terms of Use' and then select 'Create'
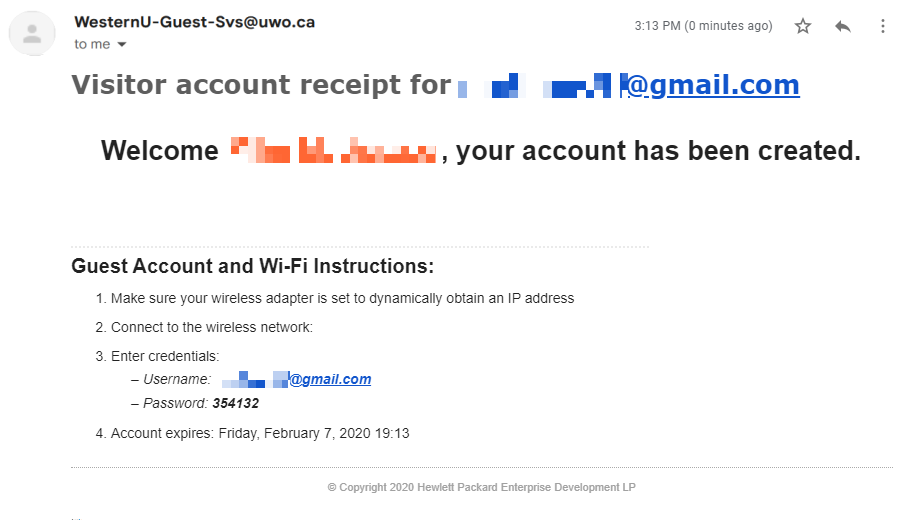
- The guest will then receive a 'Visitor account receipt' email from WesternU-Guest-Sys@uwo.ca
WesternU-Guest
To utilize the WesternU-Guest network, a Faculty or Staff member from Western University must sponsor you. You'll be asked to enter their email on the authentication page. Your sponsor will receive an email with an activation link.
NOTE: Emails are sent to the sponsor's @uwo.ca email address and not their affiliate address (@ivey.ca, @kings.uwo.ca, @schulich.uwo.ca).
Connecting to WesternU-Guest - Explains how to connect to the WesternU-Guest network.
Introduction
This document outlines the process of connecting to the WesternU-Guest wireless network.
Procedure
- Select 'WesternU-Guest' from the list of available Networks and select 'Connect'.
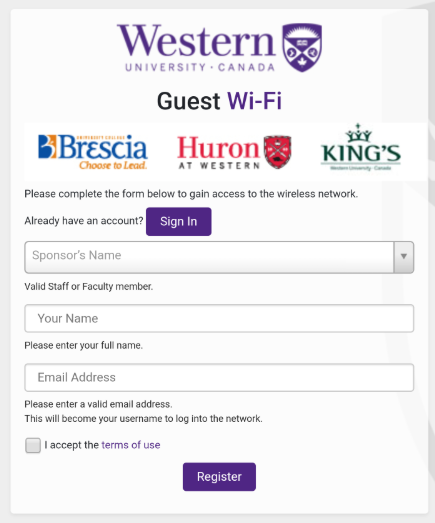
A new window should pop up on your device asking for authentication. If no windows are displayed, open your browser and try accessing a website. You should be redirected to the authentication page. - On the authentication screen, fill out your Sponsor's Email, Your Name and Email Address. Accept the terms of use, then select 'Register'.
- If your sponsor has provided you with a Guest account, select 'Sign In' Enter the username and password. Accept the terms od use, then select 'Login'
Your sponsor will receive an email to authorize or deny your access to the network.
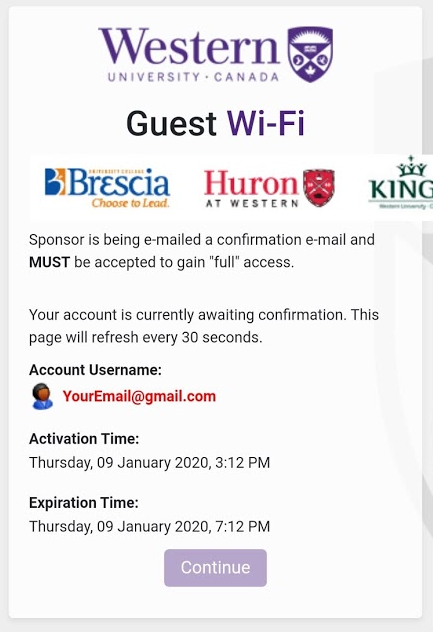
After being authorized by your sponsor to access the network, you will be redirected to the success page:
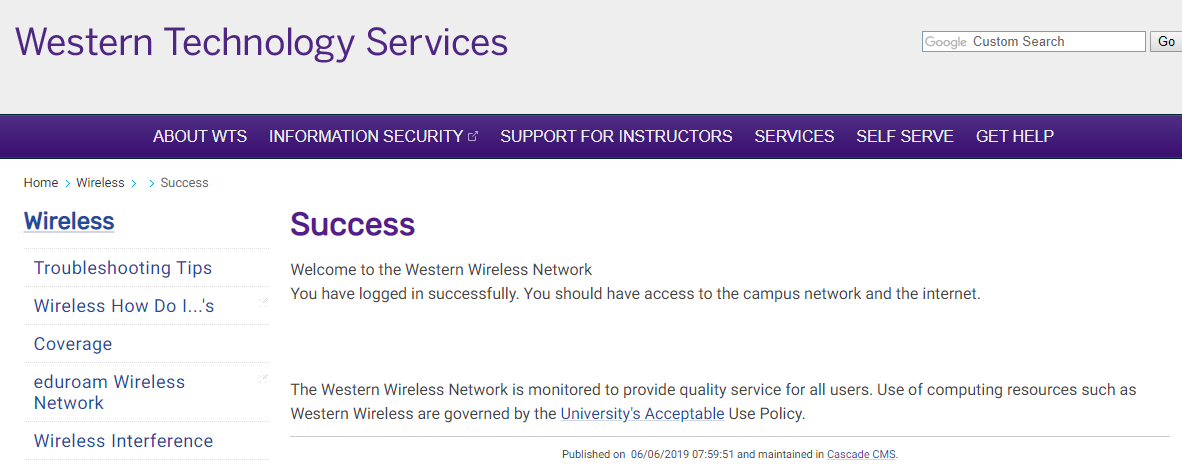
Now you are successfully connected to the WesternU-Guest network. A Visitor account receipt will be sent to your email from WesternU-Guest-Sys@uwo.ca. The username and password provided can be used to login to an additional two devices.
Sponsor Approval - Explains the steps a Sponsor will take to approve Guest access.
Introduction
This document will help you approve or reject access to a Guest who is requesting visitor access.
Procedure
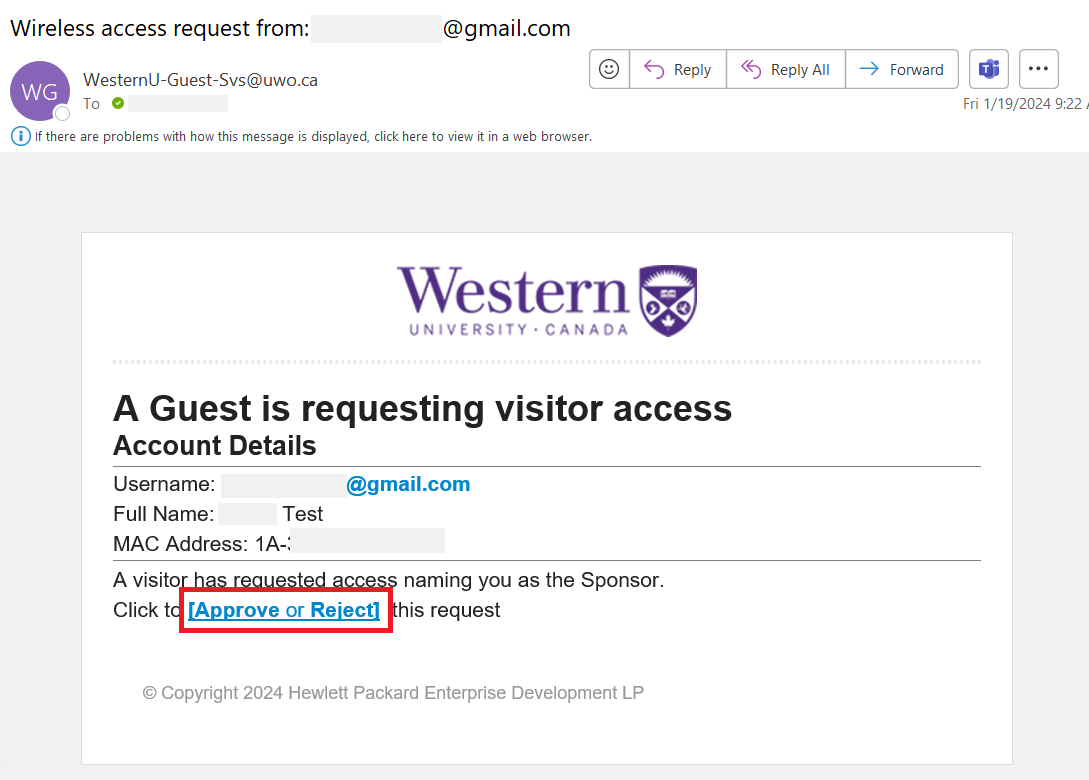
An email will be sent to the sponsor from WesternU-Guest-Svs@uwo.ca
In this email there is the Email, Full Name and Mac Address of the Guest requesting access.
- Select 'Approve or Reject' to be taken to the approval page.
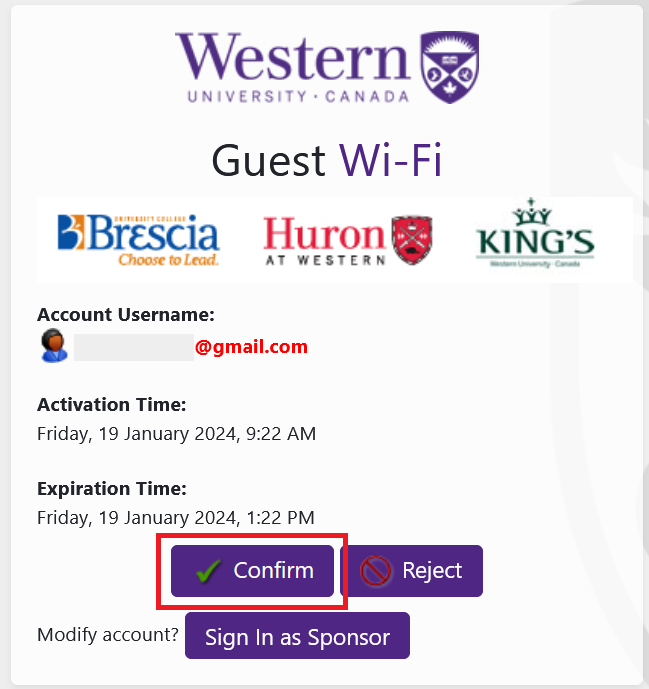
- Select 'Confirm' to approve the Guests access. This access lasts for four hours by default.
Guest Management Page - Explains how to manage Guest accounts and increase connection lease time.
Introduction
Sponsors can go in and increase the lease time of the Guest. This time can be increased by up to eight hours, for a total of 12.
NOTE: Expiration time can only be adjusted BEFORE the expiration of the account.
Procedure
- Go to the Sponsor sign In page: https://clearpass.wireless.uwo.ca/guest/guest_users.php
- Login with your Western user ID and password.
- Select 'Manage Accounts' on the top left if you have not been redirected there already.
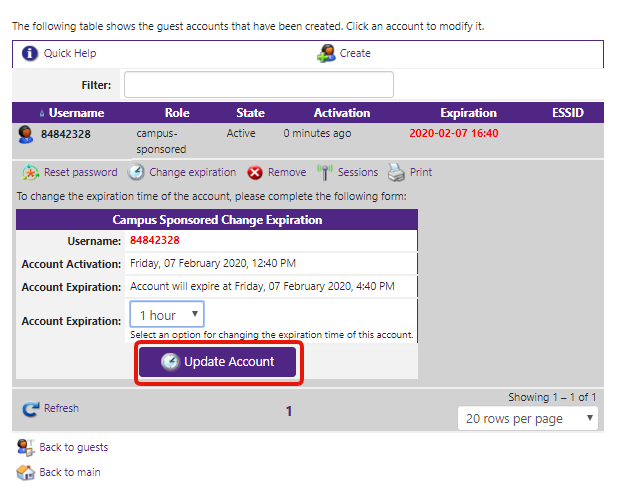
- Select the user you want to change the lease time.
- Select 'Change Expiration'
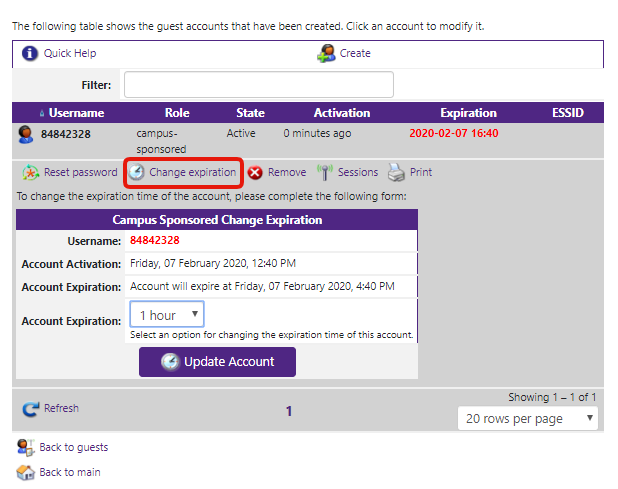
- Under 'Account Expiration' select the desired time you want to add to the lease time.

- Select 'Update Account'
Create Single Guest - Explains how to create a Guest account for the WesternU-Guest network.
Introduction
A sponsor can create accounts to be used on the WesternU-Guest wireless network. These accounts will use a valid email address for the username, and a password with six random numbers.
Note: If you have already sponsored five or more accounts you can not use this function.
Procedure
- Go to the Sponsor sign In page: https://clearpass.wireless.uwo.ca/guest/guest_users.php
- Login with your Western user ID and password
- Select 'Create Account' on the top left.
- Under 'Guest's Name' Enter the name of the guest.
- Under 'Email Address' Enter the email address of the guest. This needs to be a valid email address.
- Under 'Auto Email' Select whether you want the guest to receive a 'Visitor account receipt' email from WesternU-Guest-Sys@uwo.ca containing a username and password.
- Under 'Account Activation' Enter the date and time the account will be activated. Leave this blank if you want the account activated now.
- Under 'Expires After' Select the amount of time the account will have wireless access for. The default is four hours with a maximum of 12.
- Accept the 'Terms of Use' and then select 'Create'
- The guest will then receive a 'Visitor account receipt' email from WesternU-Guest-Sys@uwo.ca
Create Bulk Guests - Explains how to create bulk Guests for the WesternU-Guest network.
Introduction
A sponsor can create multiple accounts to be used on the WesternU-Guest wireless network. These accounts will have a random username consisting of eight random numbers, and a password with six random numbers.
Note: If you have already sponsored five or more accounts you can not use this function.
Procedure
- Go to the Sponsor sign In page: https://clearpass.wireless.uwo.ca/guest/guest_users.php
- Login with your Western user ID and password
- Select 'Create Multiple'
- Under 'Number of Accounts' Select the number of accounts you wish to create with maximum of five.
- Under 'Account Activation' Select the time when the accounts will become active.
- Select 'Account Expiration' Default is four hours with a maximum of 12 hours.
- Select 'Create Accounts'
- You will be presented with a list of accounts with usernames and passwords.
Request Contractor Account - Explains how to request a Contractor account for the WesternU-Guest network.
Introduction
A sponsor can request Contractor accounts to be used on the WesternU-Guest wireless network. These accounts will use a valid email address for the username, and a password with six random numbers. These accounts can have an expiration date of up to 30 days.
NOTE: If access required is beyond 30 days please request a service identity
Procedure
- Sponsors will have to fill out the Jira request form at https://westernu.atlassian.net/servicedesk/customer/portal/2/group/136/create/615
- Login with your Western user ID and password
- Fill out the form and select 'Create'
- Once the request has been reviewed and approved, the contractor will then receive a 'Visitor account receipt' email from WesternU-Guest-Sys@uwo.ca
Conference Wireless
Conference Network - Information on how to request a Wireless Confrenece network for an event
For information on requesting a Wireless Conference network for an event please refer to the documentation at https://wireless.uwo.ca/conference_wireless.html
Wireless Printing
Print from a Laptop - Explains how to print wireless from your laptop.
Introduction
This document will allow members of the university community to print to a select group of on-campus library printers. This document describes how to login to PaperCut, and configure it to send the print jobs to the on-campus printers. These instructions assume that you have an internet connection set up and you have administrative rights to install the driver on your Operating System.
Procedure
Step 1 - Log in to your Papercut account on any device
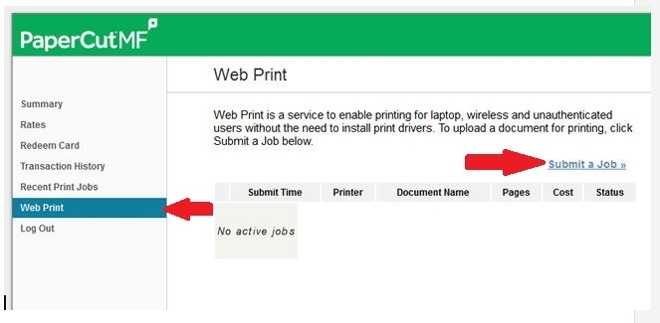
Click "Web Print".
Click "Submit a Job".
Step 2 - Select a printer
Select "drucker\Library-Black-and-White" for black & white, or "drucker\Library-Colour" for colour

Click "Printer Options and Account Selections" to change the number of copies as required.

Step 3 - Upload your documents to the printer
Click "Upload Documents".
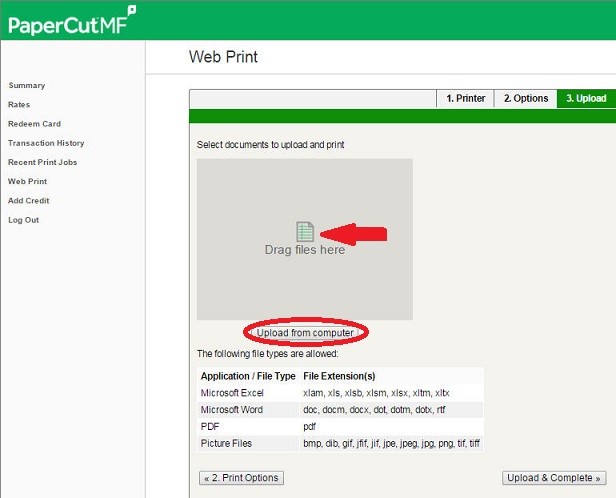
Drag one or more files, or click "Upload from Computer" to browse and select files to print.

Click "Upload & Complete" to send the document(s) to the printer.
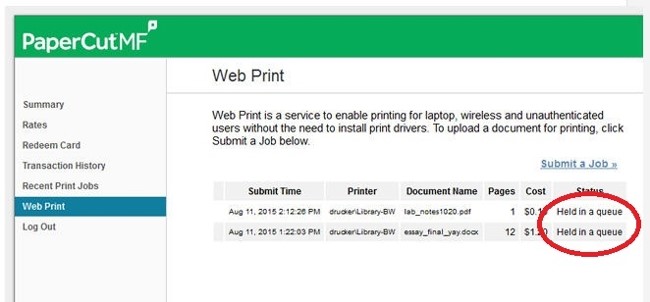
Once the upload is successful the status will display "Held in queue".
Log in to the Print, Copy, Scan station with your Western User ID and password, release and retrieve your print job.
Published on and maintained in Cascade.