Email Settings
Interested in intermediate-level training on Outlook settings? View this previously recorded session: Microsoft Outlook Level 200 Training Session - August 2021 approx. 90 minutes
Email Forwarding - How do I forward my Western email to another account?
Email Quota - How do I check my email mailbox storage limit?
This page explains how to check the amount of quota used by your email address.
Outlook on the Web
1. Go to myoffice.uwo.ca and login, and click on Outlook.2. Click the Gear icon in the top right

3. Click on General, then Storage. Your used space will be displayed.

Outlook 365 Application (Windows)
- Click "File"
- Underneath the "Mailbox Settings" section, you will see how much storage you have.

Backup your Email - How do I backup my mailbox?
Add a shared email folder - How do I add a shared email folder?
Outlook 365 Application (Windows)
1. Open Outlook
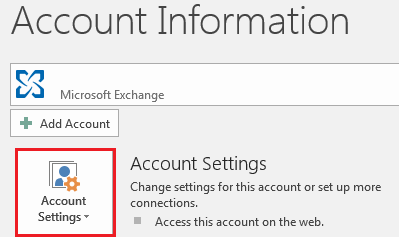
2. Click on File
3. Click Account Settings button, and then click the Account Settings... button that appears below
4. Click the Email tab in the list
5. Click the Change button and then click More Settings
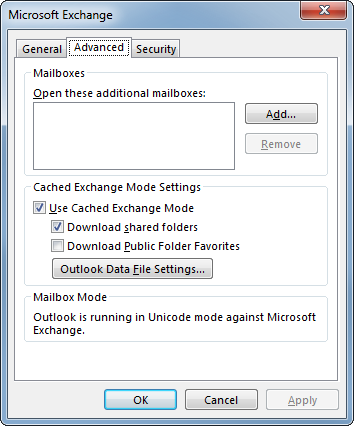
6. On the Advanced tab, under Open these additional mailboxes, click Add, and then enter the mailbox name of the person whose mailbox that you want to add to your user profile. If you do not know the mailbox name, ask the person who granted you permissions
Outlook Web Access (OWA)
1. Go to https://myoffice.uwo.ca and login
2. Click on the Mail icon
3. Right-Click your name (where it shows above Inbox), click Add shared folder…
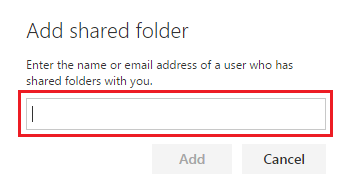
4. Enter the email address of the person that owns the folder you wish to add
5. Click the Add button
The Shared folder should now appear in your folder list under a Shared Folders heading.
Share an email folder - How do I share an email folder with other users?
Step 1 - Set the Default Permission on Your Mailbox
Outlook 365 Application (Windows)
- Open Outlook
- Click on the Inbox
- Right Click your email address (where it shows above Inbox), click Folder Permissions
- Click Default, in the box at the top
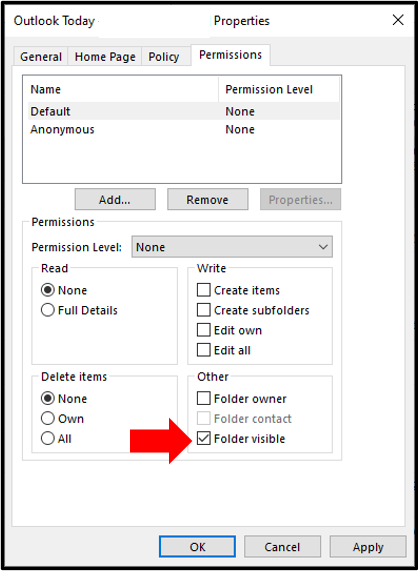
- In the Permissions section, go to Other, and select "Folder Visible", click Apply and then click OK
Outlook on the Web
- Go to myoffice.uwo.ca and sign in
- Click the Outlook icon to open Outlook
- Right click Folders and click "Sharing and Permissions"
- Click "Folder Visible" and click OK
Step 2 - Share your Email Folder
Outlook 365 Application (Windows)
- Open Outlook
- Click on the Inbox
- Right Click the folder you want to share, click Properties
- Click the Permissions tab
- Click the Add button
- Enter the Name of the person you wish to share with in the search box
- Click their name to select them, then click Add
- Click OK
Outlook on the Web
- Go to myoffice.uwo.ca and sign in
- Click on "Outlook" to open your mailbox.
- Right click the folder you'd like to share and click "Sharing and Permissions"
- Click the "+" icon and search for the user you'd like to add and click "Add".
- Click OK
Use the tick boxes to select what specific permissions to assign the user. Use the Permission Level drop-down menu to easily set pre-defined sets of permissions.
Recall an Email message - How do I recall an email that was sent?
This page explains how to recall email messages that you have sent to other Office 365 users. When you recall an email, the message that you sent is retrieved from the mailboxes of the recipients who haven’t yet opened it. You can only recall messages that have not been read or moved out of the recipient's Inbox.
NOTE: This feature is not available in the Outlook Web App (OWA).
Procedure
1. Start Outlook 365.
2. In the folder pane, click the 'Sent Items' folder.
3. Locate the email message you wish to recall, double click on the message. The email should open in a new window.
4. Click 'File'
5. In the left pane click 'Info'
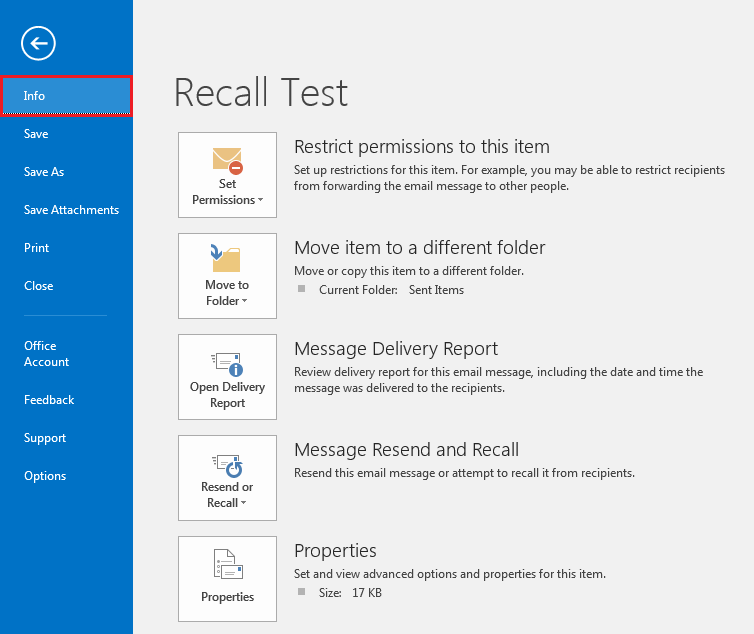
6. Click the button 'Resend or Recall'
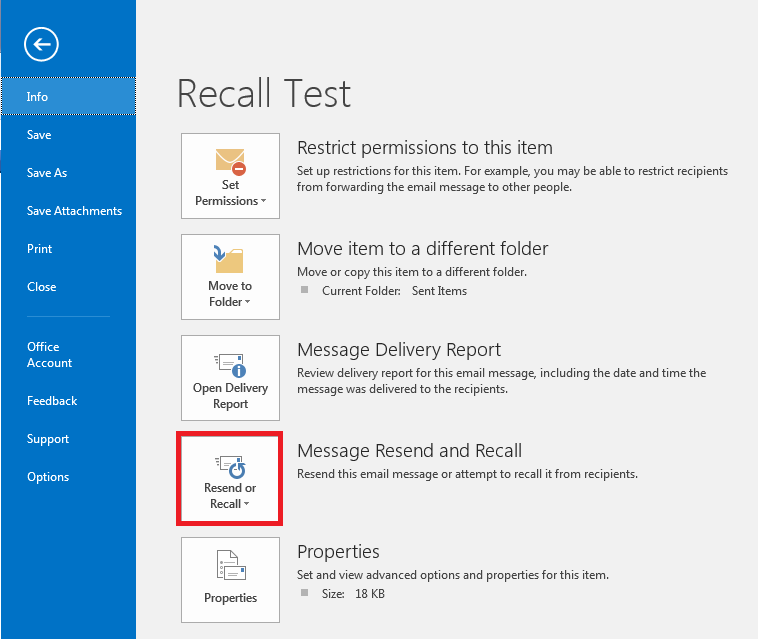
7. Click 'Recall this message...' that appears below

8. In the new window that appears press the 'OK' button.
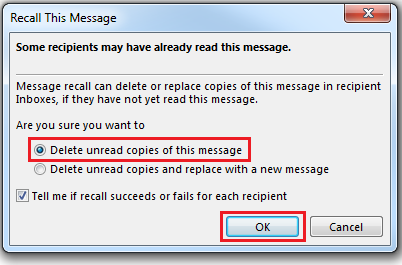
9. If the message is recalled successfully you will receive an email with the subject: 'Message Recall Success:'
Send Email as another account - How do I send email as a delegate?
Introduction
This page explains how to send email as another account.
A manager is the person/account which allows someone to Send on your Behalf.
A delegate is the person/account which receives Send on Behalf permissions.
NOTE: The functionality Send on Behalf of a Mailing List is not supported in Office 365.
You must have delegate access to create or reply to an email message on behalf of another person. If you do not have access follow the "Obtain Access to Send" process.
- Ask a Manager to delegate Send on Behalf permissions - Follow the "Obtain Access to Send" process.
- A Delegate can Send on Behalf of a Manager - Follow the "Send Email on Behalf" process.
Allow a Person/Account to Send Email on Your Behalf
A valid email address configured in Outlook is required delegate access to send on your behalf.
Outlook 365 Application
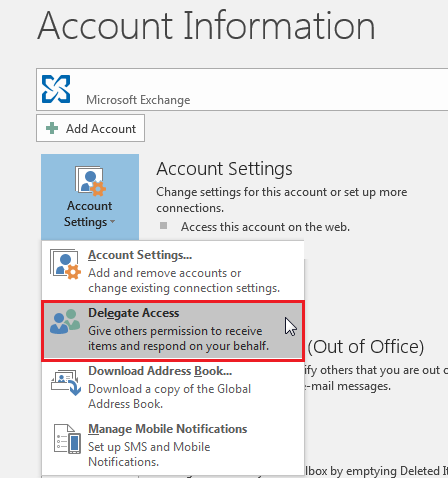
1. Click the File tab.
2. Click Account Settings button, and then click Delegate Access.
3. Click Add.
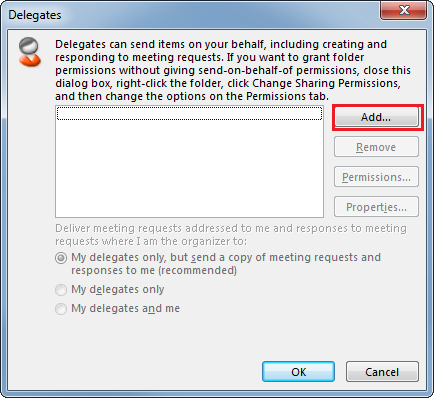
4. Type the name of the person whom you want to designate as your delegate, or search for and then click the name in the search results list.
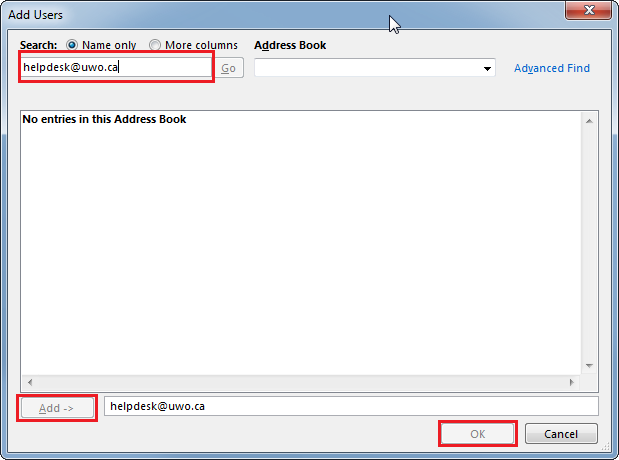
5. Click Add, and then click OK.
6. In the Delegate Permissions dialog box, change the Calendar and Tasks drop down to "None".
NOTE: Send Email on Behalf permissions are assigned automatically. Delegated Calendar and Task permissions is not required.
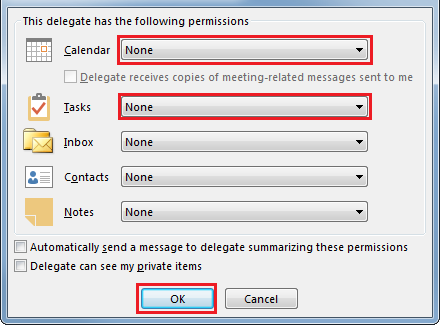
7. Click OK.
Send Email on Behalf of Another Person/Account
Upon the completion of the "Obtain Access to Send" process, you can create or reply to an email message on behalf of another person.
Outlook 365 Application
-
In Outlook, click New Message.
-
Click on the three dots button (beside the Discard button), then click on Show From.
-
In the From box, type the name of the person on whose behalf you are sending the message.
To select the name from a list in the Address Book, click From.
-
Add recipients, a subject, and the contents of the message.
Automatic Replies - How do I set an automatic reply or out of office message?
Outlook 365 Application
- Click 'File'
- Click 'Automatic Replies'
- Select 'Send automatic replies'
- Specify a range of dates, if desired
- Click the 'Inside My Organization' tab and set your vacation message
- Click the 'Outside My Organization' tab and set your vacation message
- Click 'OK'
Outlook Web App (OWA)
1. Go to https://myoffice.uwo.ca and login, go to your Inbox
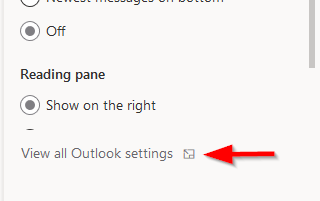
2. Click the Gear icon in the top right
3. Click on View All Outlook Settings
4. Under Mail, click on Automatic Replies.
5. Turn on the Turn on automatic replies option.6. Specify a range of dates, if desired
7. Fill in your vacation message for both the "inside my organization" and the "outside my organization" section.
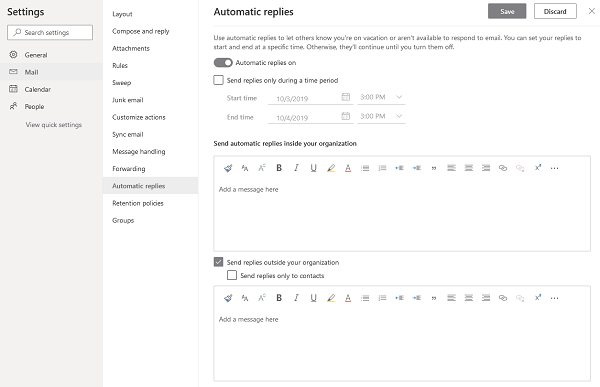
7. Click 'Save'
Manage Email Signatures - How do I create and back up email signatures?
How to create a signature
Outlook Web Access (OWA)
1. Go to myoffice.uwo.ca and login, go to your Outlook
2. Click the Gear icon in the top right
3. Under Mail > Compose and reply you can set your email signature.
3b. Enter an email signature into the blank box.
To include the Western shield logo in your signature, right click the image below and click Copy Image. Paste the image into the signature box in OWA
For Faculty specific logos, https://communications.uwo.ca/comms/western_brand/email_signature.html
4. Click 'Save'

Outlook 365 Application
- Open Outlook
- Click File
- Click Options
- Click Mail
- Click Signatures
- Click the “New” button and enter a name for your signature
- If you saved your Email Signature before migrating, then find that document and Copy/Paste your Signature into the box
- Click OK
How to back up your signature
Outlook 365 Application
- Click File
- Click Options
- Click Mail
- Click Signatures
- Highlight your Email Signature and copy/paste it into a word document. Save the word document so you can recreate your signature after migrating.
Mac Mail
- Click Mail
- Click Preferences
- Click Signatures
- Highlight your Email Signature and copy/paste it into a word document. Save the word document so you can recreate your signature after migrating.
Language and Time Zone - How do I change my language and time zone settings?
In Outlook for the Web you can change your default language and timezone.
Procedure
1. Go to https://myoffice.uwo.ca and login, go to Outlook
2. Click the Gear icon in the top right
3. Under General click Language and Time
4. Set your Language and Timezone as desired and click 'Save'
Managing the .PST file - How do I manage my .PST file?
Scheduled Email Delivery - How do I send my emails at a specific time?
Outlook allows you to schedule emails to be sent at a date, and time that you specify.
Outlook on the Web
- Go to https://myoffice.uwo.ca and login, go to Outlook
- Click New Message
- After you're done composing your message, click on the downtick on Send and click Schedule Send.
- Choose your desired date and time and click Send
Outlook 365 Application
- Click "New Email" to start your new message
- In the "Tags" section in the ribbon, there is a Properties icon. Click that to open the message properties.
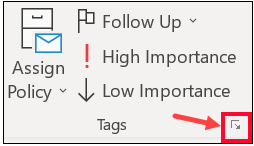
3. Check in the "Do not Deliver before" and select the day and time from the dropdown lists and click close, then send your message.
Other Setup Guides - setup guides for services such as Gmail
Published on and maintained in Cascade.